New hand tools…

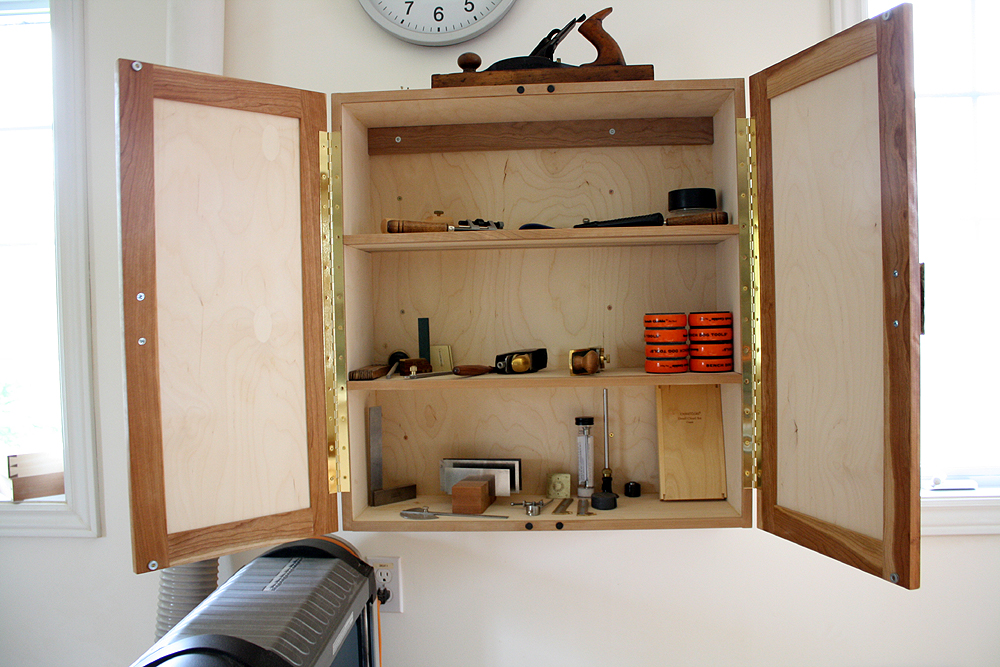
Have a look.. 6 new hand tools!  Updated Tools section at Pirollo Design!  Performed the photography today.

Beading Tool

This tool project was supposed to be completed a month ago but I had major issues (out of my control) to deal with in my small artisan business. So I was in suspense for a month waiting for things to settle. The Courses tab has also been beefed up with new photography and sub-categories as well as a more up to date Blog section. I will be creating short videos on each of the tool pages to demonstrate how to effectively use the tools. Two more tools are in the pipeline before the end of the year. I enjoy learning and challenges, so spent time designing and prototyping these tools. The design and prototyping stages were actually fun, but sourcing the hardware was at times frustrating. It’s all good now, I am significantly more knowledgeable in this space than only 3 months ago.

Try Square

The hand tools are predominantly shaping and measuring tools. I made these to address processes I use in my own furniture making. For example, the depth gauge address the issue of determining the depth of holes or mortises. I would find myself using small bamboo sticks, pencils, etc. to perform this measurement. I knew there had to be a better way. Another example, the measuring tool helps considerably in transferring measurements from one board to another. This is a function I often use in my own furniture making and wanted to address it with a dedicated tool.

Enigma wood case…

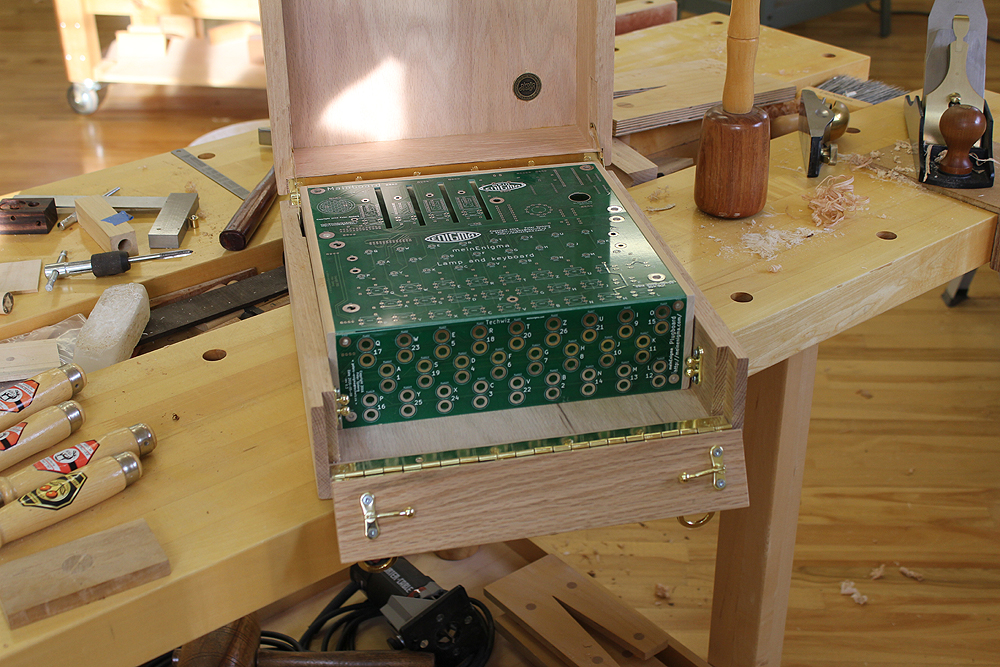
I was asked to make a traditional wood case for a replica of a WWII German Enigma encrypting machine. The modern-day version is mostly electronic but it performs the same functions. I would need to make it to scale and similar to the original in most ways. This Enigma is mostly electronic with large selector wheels, LED numbers, switches and a keyboard. As well, the front panel (Steckerbrett) contains jacks for plugs and wires. The front of the outer box (Klappe) is latched, but flips down for access to the Steckerbrett.

Enigma wood case

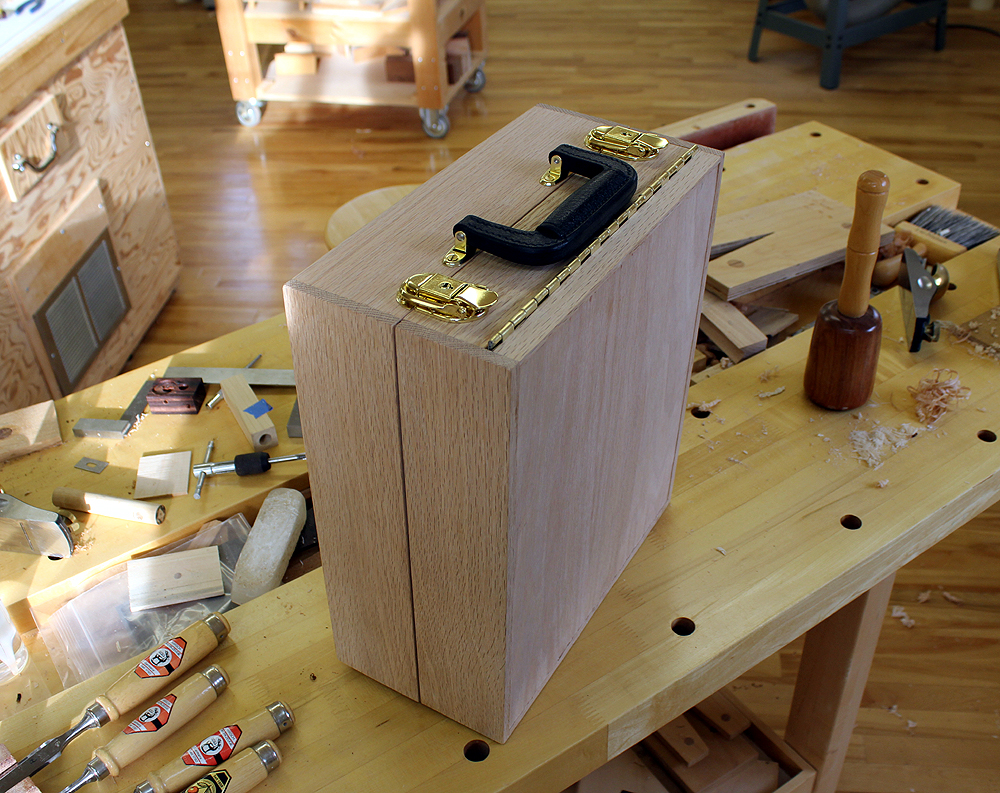
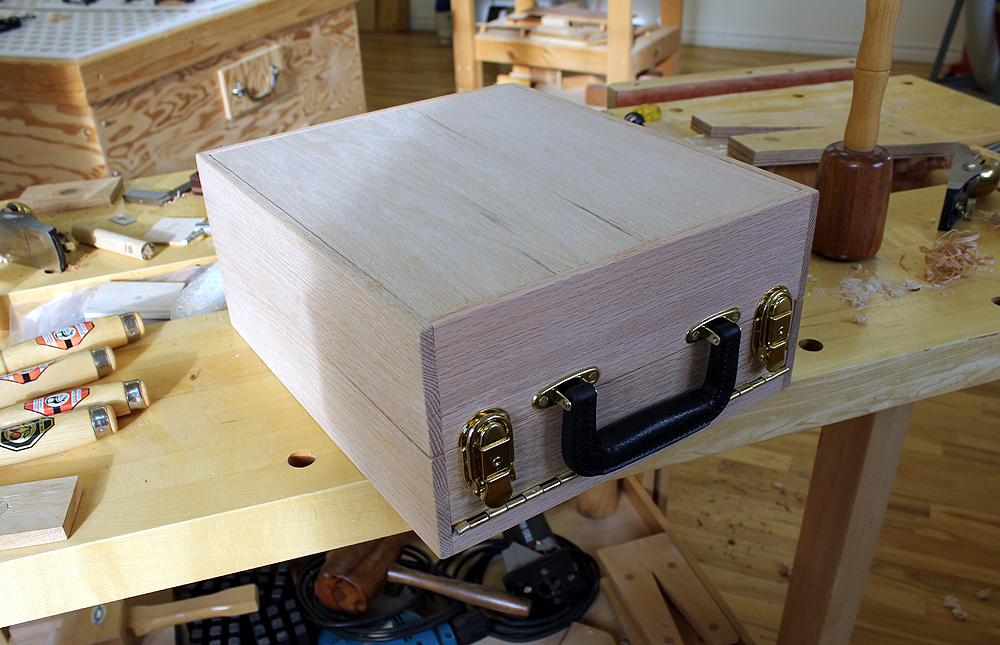
The build involved much research into existing Enigma wood cases and of course, the original version. I found out that the traditional wood used was oak so of course, it had to be made of oak. Next was sourcing the wood and unique hardware. There is also an inner box which houses the circuit boards and this fits into the outer box.

Enigma Wood Case

The design of the Enigma case call for locks, so I installed two locking latches and two inner catches for the Klappe flip-down front. I began the build. It went fairly smoothly except for one hangup. Installing lid stays would be a problem since there almost no clearance between the inner box and outer box edges. So mortises had to be created for the small lid stays. This worked out well. The circuit boards are currently bare and were only used for fitting.

Enigma Wood Case

Once complete, it will be a busy array of lights, switches, large selector wheels, keyboard, lights and jacks and cables. I’ll post a 100% completed photo of it with finish applied next week. Of course, I have my Maker’s Mark applied…lol

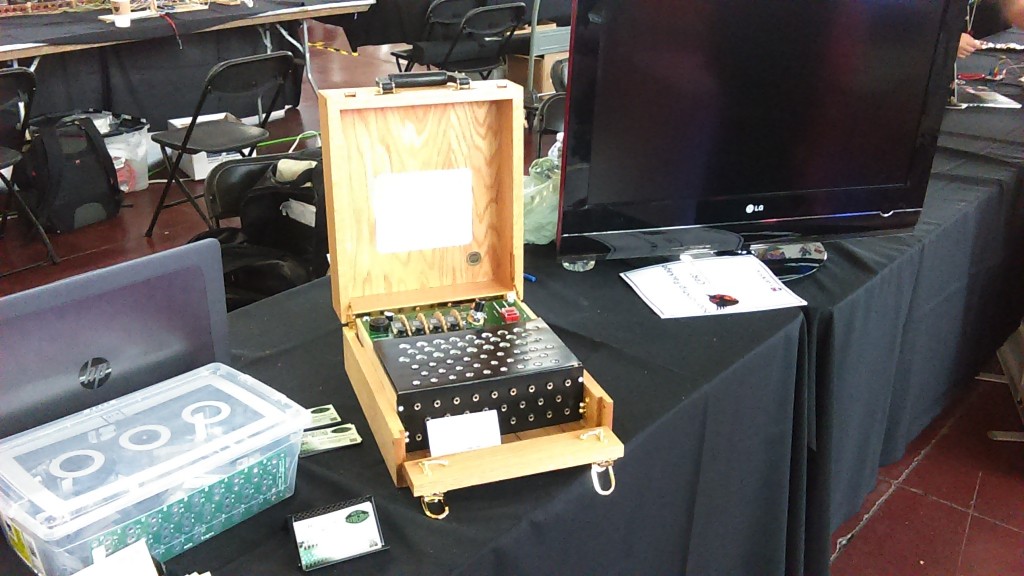
Two photos below of the completed Enigma wood case with the electronics, wheels, switches, keyboard and plugs installed. These photos were taken at a Maker Faire venue in Ottawa, Ontario. Peter Sjoberg, the designer of the Enigma machine itself, can be seen in one photo.

Maker Faire 2016

mein Enigma booth

Beading Tool

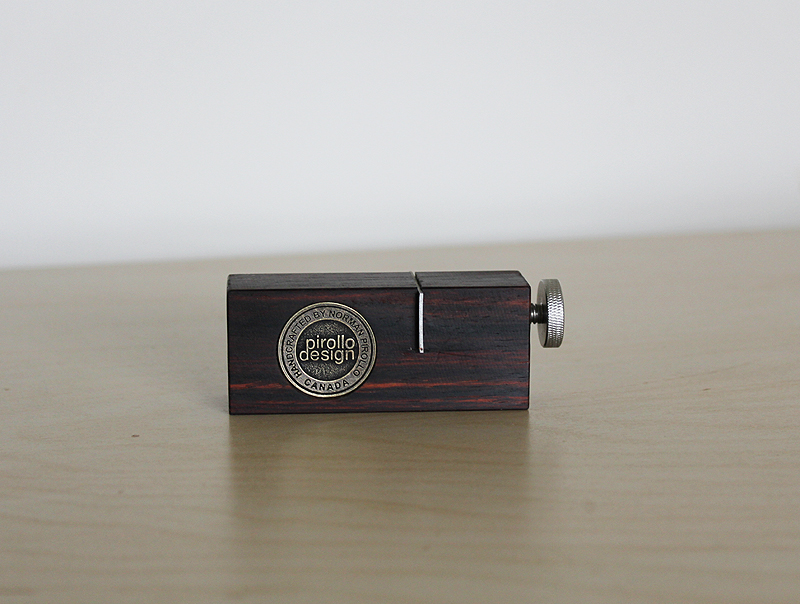
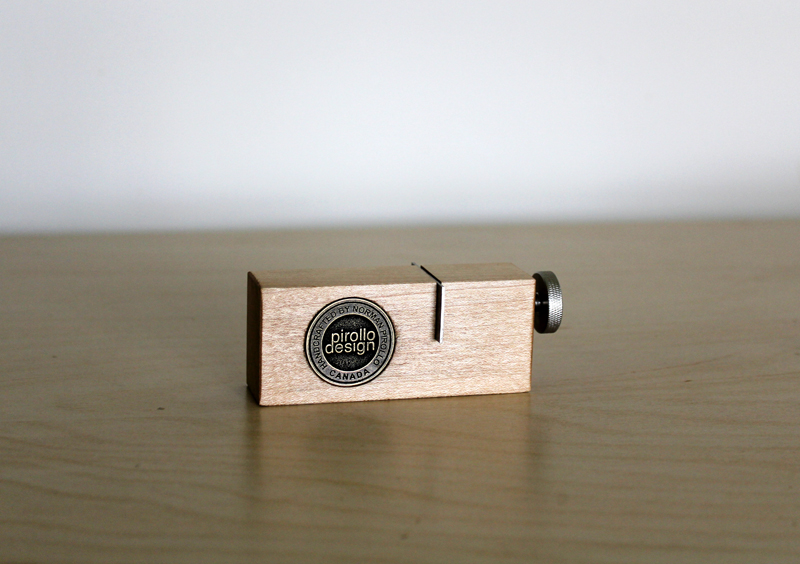
This palm-sized beading tool is an excellent and convenient method to create small profiles along the edges of boards. The beading tool is held tightly against the edge and run up or down to slowly create a profile. The cutting edge profile of the beading tool is formed into each corner of a .05 in. spring steel cutter blade. There can be four profiles formed into each rectangular cutter blade. The profiles are created using small round and triangular needle files. The cutting blade is held in a precisely cut slot and tightly fastened using a stainless steel knurled thumbscrew.

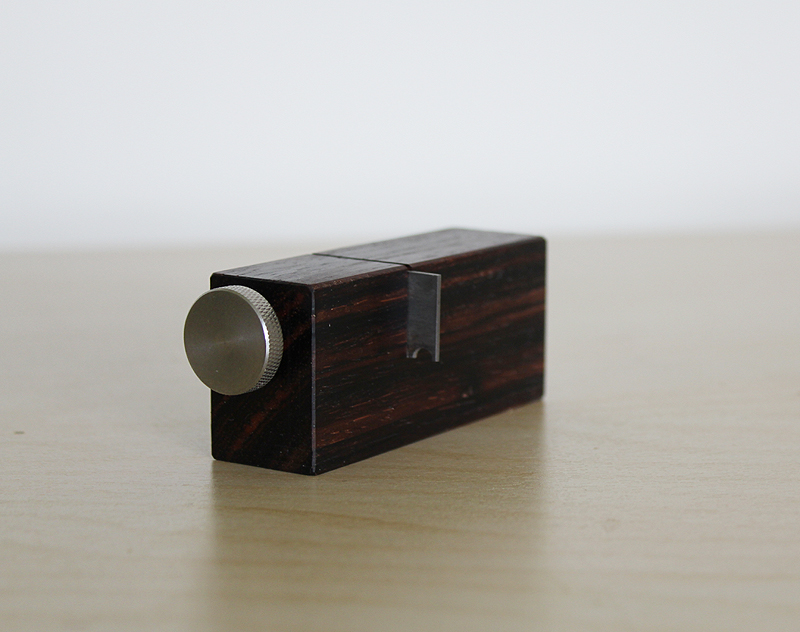
Beading Tool (Rosewood)

The beading tool can be run either towards you or away from you depending on the grain orientation of the board being profiled. This is easily determined once the beading begins. Beading tool shown in both rosewood and maple configurations.

The beading tool has a hardened cutter with a profile formed into it, a quirk-bead and a sharp point for creating inlay grooves.

Beading Tool (Rosewood)

Inspiration for beading tool design provided by Garrett Hack. Beading tool not for sale at this time.

Center Finder Tool

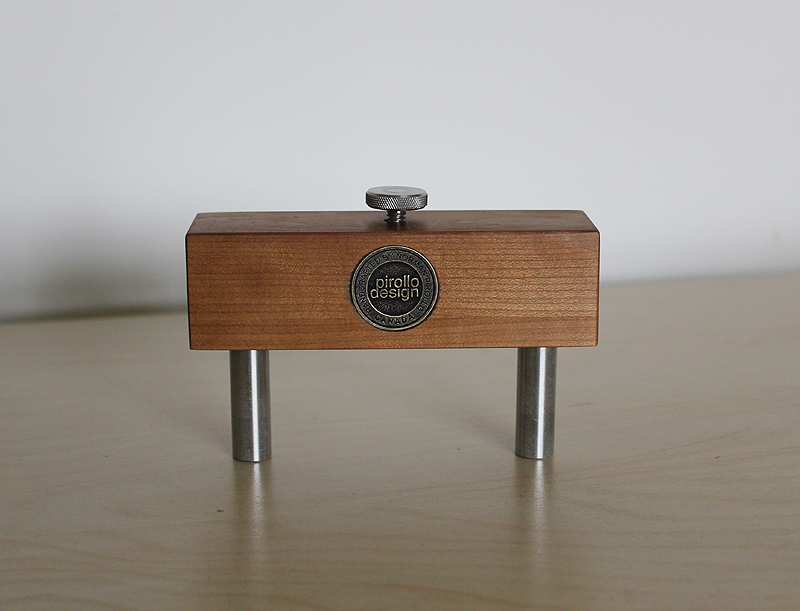
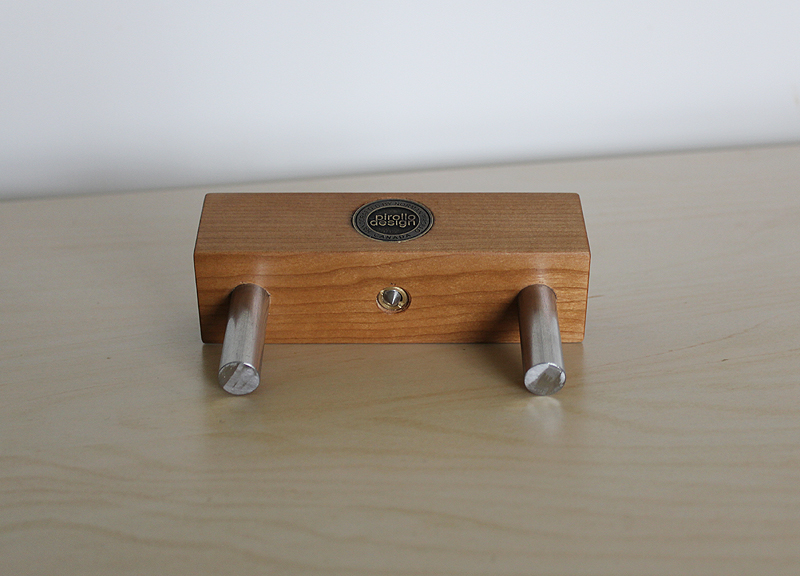
One of the most difficult measurements is that of finding the center of the edge of a board. The width of the edge of a board is just too narrow to make precise measurements and markings. The center finder tool is used to facilitate this process. By running the stainless steel pins diagonally along the outside faces of a board, the center pin marks the exact center of the edge of the board. The center of the board edge can be used to mark out mortises, lap joints or simply to saw the board in half. This center finder tool has a hardwood cherry block with integral stainless steel pins.

Center Finder Tool

The center-mounted stainless steel marking pin can be adjusted for depth. The marking pin tip can also be sharpened if necessary. The 3.5 inch center to center distance between the large stainless steel pins ensures that the center lines of the edges of thick boards can also be obtained. The center finder tool is designed to be used for generations with the utilization of solid hardwood and stainless steel components. Oiled finish.

Center Finder Tool

Hardwood cherry block length, height – 4.5 inches, 1.5 inches
Hardwood block – 1.5 inches thick
Center to center – 3.5 inches


Try Square

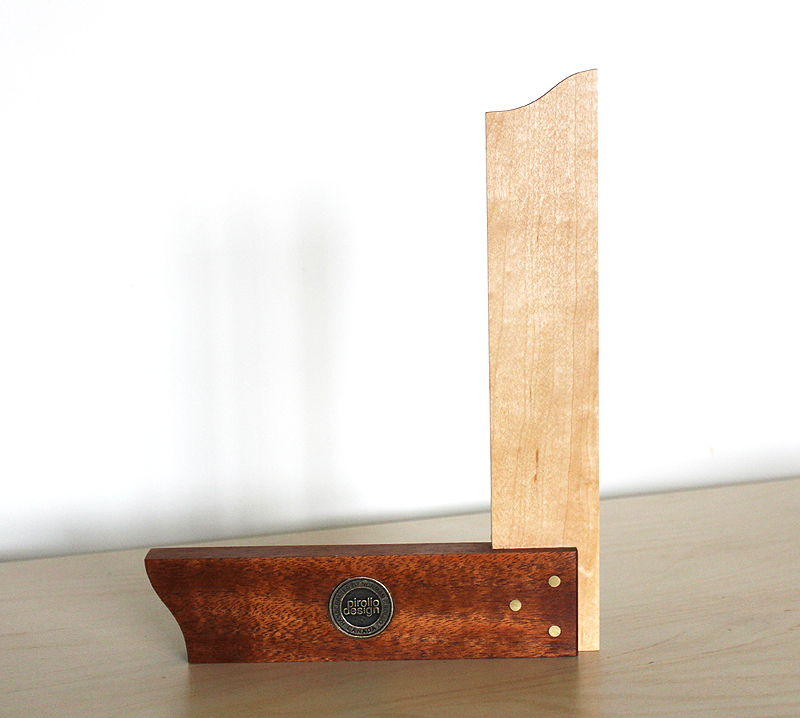
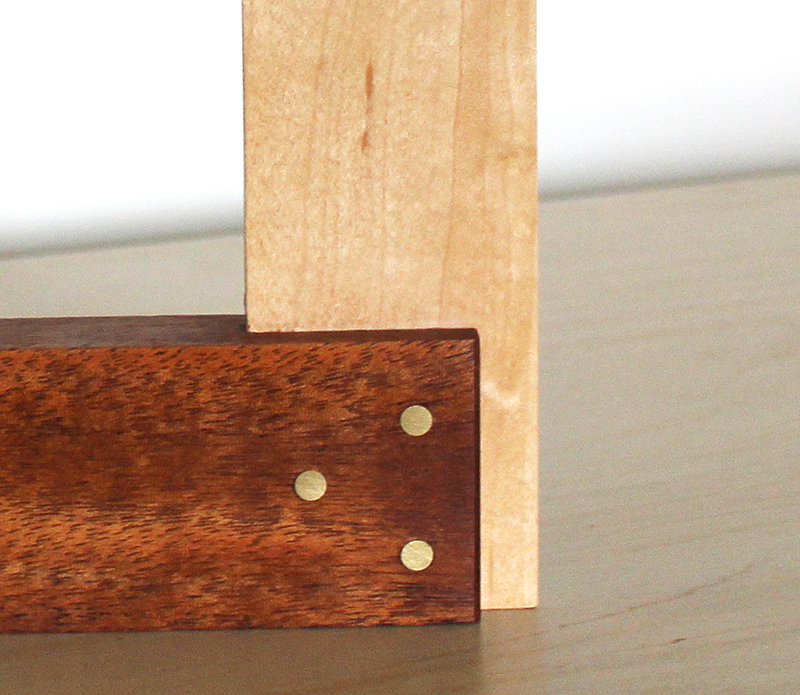
This solid wood, traditional try square follows in the steps of furniture makers of past centuries. Wood try squares were a mainstay of traditional furniture making shops until early in the 20th century. Composed of a mahogany base and a straight-grained maple blade, this try square will provide years of precise measurements. The maple blade is designed to be trued if it loses its precise 90 degree adjustment relative to the stock. Wood try squares are easily adjusted by using a proven technique of flipping the try square along its axis along the edge of a board. Simply marking out and then running a handplane across either the top or bottom of the outside of the vertical blade and the precise 90 degree relationship between the stock and blade is restored.

The blade has an additional 5/16 inch of width to allow for truing in the future. The try square is always used with the inside edge of the stock as a reference and then using the outside edge of the blade to mark a perpendicular line to the stock. The end trims of the try square incorporate a unique makers curved profile with Roubo styling. Three brass pins ensure the connection between the stock and blade never works loose.

Try Square (Brass Pins)

The size of the try square has been optimized for most furniture marking applications. The mahogany stock is relatively thick at 5/8 inches to ensure it sits over the edge of a board correctly. A maker’s mark is applied to every try square. Oiled finish.

Mahogany stock length, width – 7 inches, 1 7/8 inches
Mahogany stock thickness – 5/8 inches
Maple blade length, width – 9.5 inches, 1.75 inches
Maple blade thickness – 3/16 inches

Depth Gauge

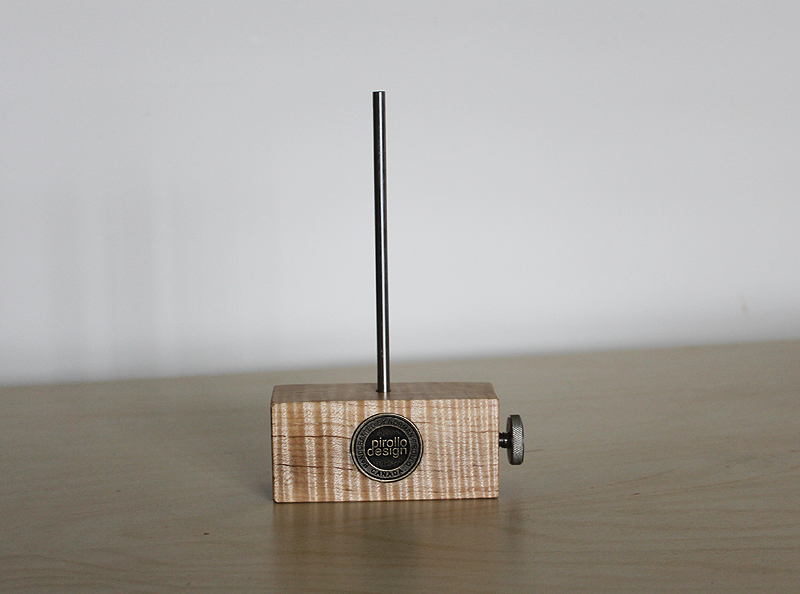
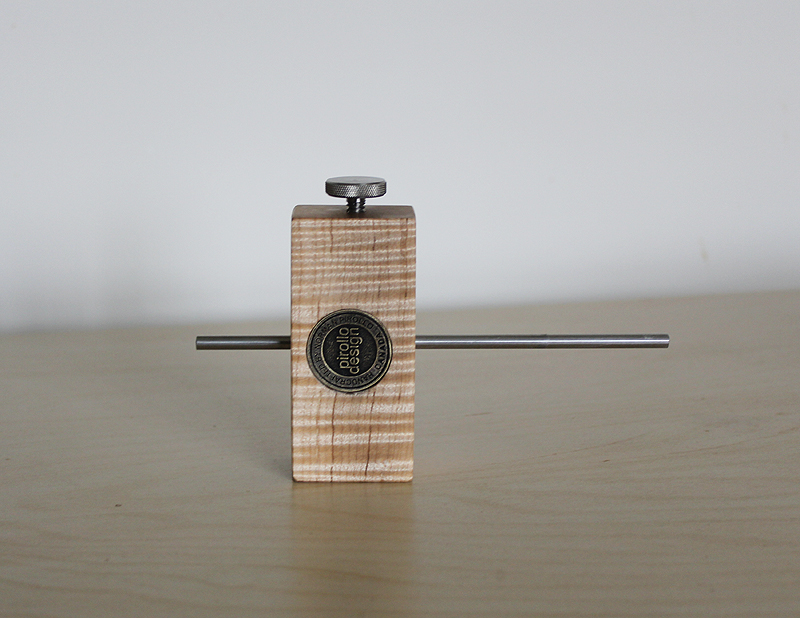
I designed this tool after realizing the need to measure the depth of holes and mortises. I would often grab a pencil, bamboo stick or small piece of wood to perform this measurement. This haphazard method of measuring depths convinced me that there had to be a better way. The components of the depth gauge are a solid block of tiger maple with an integral stainless steel knurled thumbscrew. A 6 inch long, 1/8 inch diameter stainless steel rod is used to measure the depth.

Depth Gauge

The hardwood block is designed with a sufficient bearing surface to be placed over an edge without tipping. A stainless steel rod slides effortlessly through a precision hole drilled into the hardwood block. The knurled thumbscrew locks any adjustments in. The depth gauge can be used to measure the depth of a hole or a mortise or to transfer a depth measurement from one board to another. The depth gauge can be used either vertically or horizontally through use of its large bearing surface in either axis. Oiled finish.

Depth Gauge

Depth Gauge width, height – 3.25 inches, 1.5 inches
Depth Gauge thickness – 1.125 inches
Depth Gauge Rod length, diameter – 6 inches, 1/8 inch


Measuring Tool

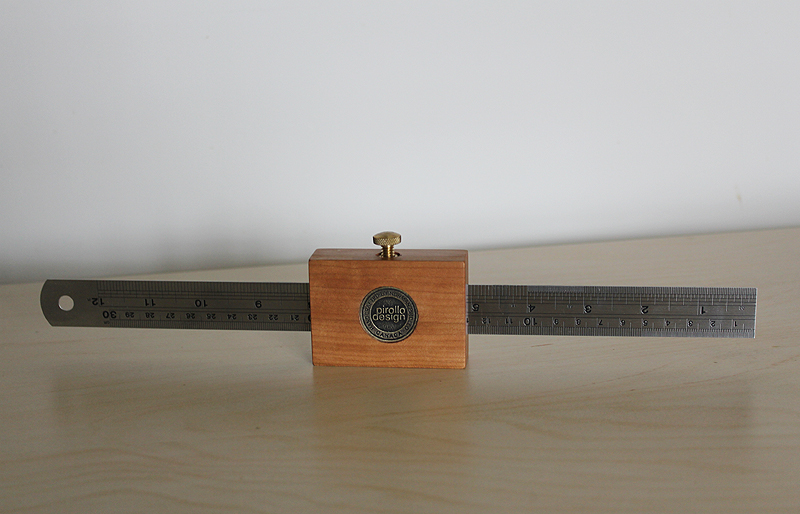
I often reach for this tool when I need to transfer measurements from one board to another. The measuring tool is composed of a solid block of cherry which is placed against the board to be measured. The high quality stainless steel rule with etched markings is then used to precisely measure the distance from the edge of the board to the final point. A solid brass knurled thumbscrew is then used to lock the measurement in. This measurement is then transferred to another board and marked out. This process greatly reduces the probability of error in transferring measurements between furniture components.

Measuring Tool

Alternatively, the measurement itself can be used for other stages of a furniture build. The solid hardwood block has a sufficiently wide bearing surface for the measuring tool to be used as a 12 inch panel gauge. By running the block against the edge of a board, a precise marking can be created from 0 to 12 inches along one edge of a board. The measuring tool includes a high quality .040 inch thick stainless steel rule with etched markings. Oiled finish.

Measuring Tool length, height –  2.75 inches, 2 inches
Measuring Tool depth  – .75 inches
Rule length  – 12 inches


Advanced Veneering

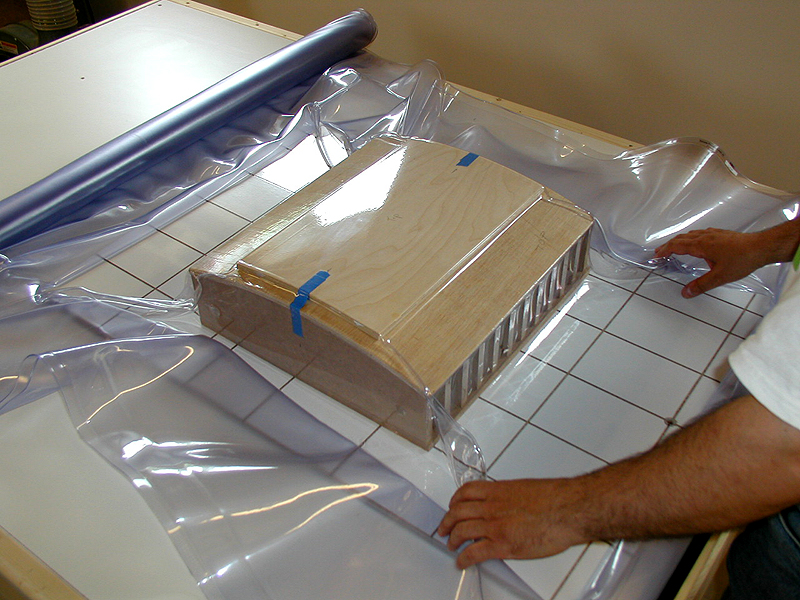
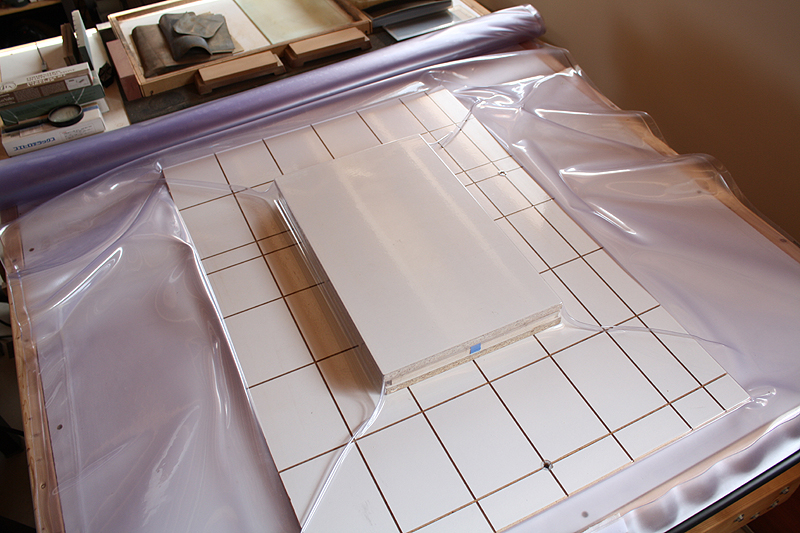
In this tutorial several topics in advanced veneering are covered. These topics range from resawing your own veneers to creating curved panels. The veneering topic emphasizes vacuum veneering as this has rapidly become the most effective and efficient process to laminate veneers onto substrates. With vacuum veneering, one less form or mold is necessary and the huge array of clamps necessary for conventional veneering is done away with.

Advanced Veneering

Both flat and curved panel veneering are covered in detail in this tutorial with a thorough step by step sequence detailing each of these processes. The detailed process of creating a curved laminated is also covered in detail.

Vacuum Veneering

This comprehensive tutorial also covers the resawing of your own veneers and the advantages of this process. The flexibility and versatility gained from resawing your own veneers is a distinct advantage over purchasing very thin commercial veneers. Resawn veneers are thick enough to be able to scrape and even handplane, much like thick solid wood.

Resawn Veneer Sheets

The bandsaw setup to be able to resaw your own veneers is also covered in depth with many photos to clarify this setup procedure as well as any modifications necessary to make to your bandsaw.

Advanced Veneering Tutorial  $14

Veneering Basics

In this tutorial the basics of veneering are presented. The basic steps involved in applying veneer to a substrate are covered following an Introduction to Veneering. Veneering is an excellent method to extract more wood from beautiful and exceptionally figured woods.

Veneering Basics

More is known today about veneering as opposed to past centuries; and much of this knowledge has been derived from examining the construction of early veneered furniture. Veneering today is once again associated with quality work and fine furniture making. There is also much more variety in veneers as opposed to solid woods. As beautiful, highly figured woods slowly become more scarce, the concept and practicality of veneering begins to make more sense.

Veneering Basics

Different techniques used to create veneer are covered as well as the advantages of each. A step by step sequence is provided where a substrate or core panel is veneered on both sides using conventional veneering techniques. The equipment and tools necessary for veneering are covered as well as the accumulated I have gained over the past decade of successfully applying veneers and creating veneered furniture.

Veneering Tools

After following this tutorial which includes three videos, you will have a good understanding of veneering.

Veneering Basics Tutorial  $14

Wood Basics

In this tutorial the selection and acquisition of wood for a woodworking workshop are presented. Buying the right wood for furniture and woodworking projects is critical as this step can lead to the success or failure of a woodworking project or furniture build. Opportunities to purchase or acquire good lumber should not be overlooked as someone else will seize on the opportunity.Wood Basics

In my own workshop, I purchase or acquire lumber when I see an opportunity and if the wood is exceptional in quality and well priced. The selection of wood for woodworking projects and especially furniture builds should be performed with care. Flaws in wood as well as which characteristics of wood to look for when purchasing lumber are covered.

Wood Basics

This tutorial also covers the steps involved in processing lumber into boards. Hardwood and softwood lumber as well as man-made wood based materials are covered in this tutorial. The process and importance of correctly drying lumber is covered as well the importance of purchasing or acquiring properly kiln or air dried lumber.

Different techniques of slicing wood from logs are discussed; both to optimize the yield extracted from a log and to generate dimensionally stable boards. After following this tutorial with included video, you will have a better understanding of what to look for when buying wood for your furniture projects.

Wood Basics Tutorial  $14

Workshop Basics

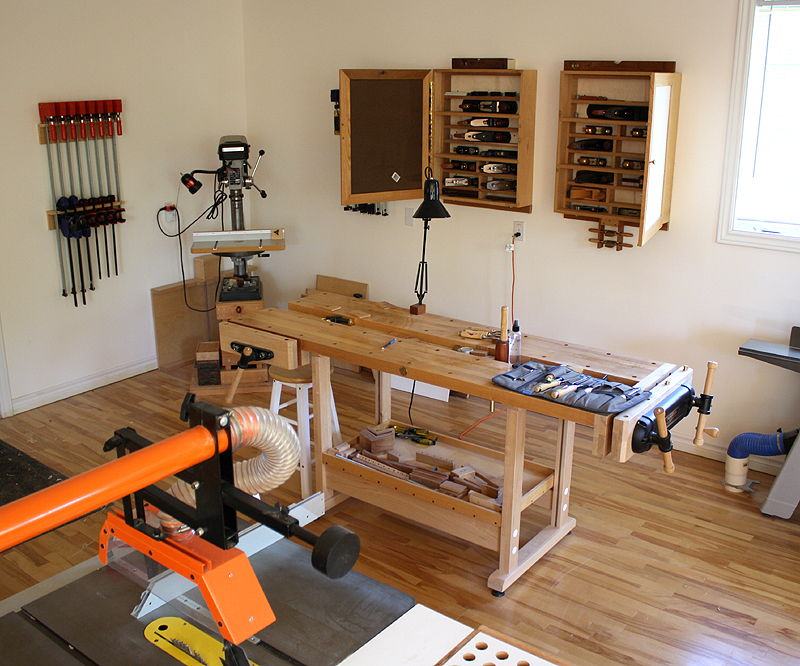
In this tutorial the requirements for a productive woodworking workshop are explained. Workshops typically evolve over time and the workshop featured in this particular tutorial has been in operation for a number of years. The fine tuning and placement of equipment and benches in a workshop occur over a period of a few years. Workshops typically share many similar features but can vary a great deal in the type of equipment and tools which form a workshop.

Workshops can be primarily machine oriented at one extreme and hand tool oriented at the other extreme. In between, there are hybrid workshops which benefit from both machinery and hand tools. I tend to favor workshops where machinery is used to process rough wood with hand tools used in the later stages of furniture making.

Pirollo Design Furniture Studio In my workshop, I have created storage and placed equipment and workbenches to maximize the efficiency of the workshop. I share with you the experience gained from many years of developing functional, efficient workshops. The core components of a workshop are discussed with many illustrations and images. As well, the safety requirements of a workshop, storage requirements, dust collection and the optimal layout of a workshop are explained.

After following this tutorial which includes the videos on workshop safety and workshop basics, you will have a good understanding of how to set up your workshop. Included are workshop tutorial, workshop basics video and workshop safety video. The Workshop Basics tutorial is downloaded to your computer.

Dust collection Pt. 1
Dust collection Pt. 2
Band saw dust collection
Shop size and layout
Workshop electrical
Workshop access and lighting
Workshop storage
Basement workshop
The workbench Pt. 1
The workbench Pt. 2
Workshop safety
Storing and processing lumber
Conclusion

Workshop Basics Tutorial  $14

Handcrafted bench dogs…

I have been successfully using these hardwood bench dogs in my furniture design+build studio for over 8 years. Why not make them available as a product. For most woodworkers, time is both limited and valuable. I have the setup and expertise to make these. The result is more free time for woodworkers to do what they love.

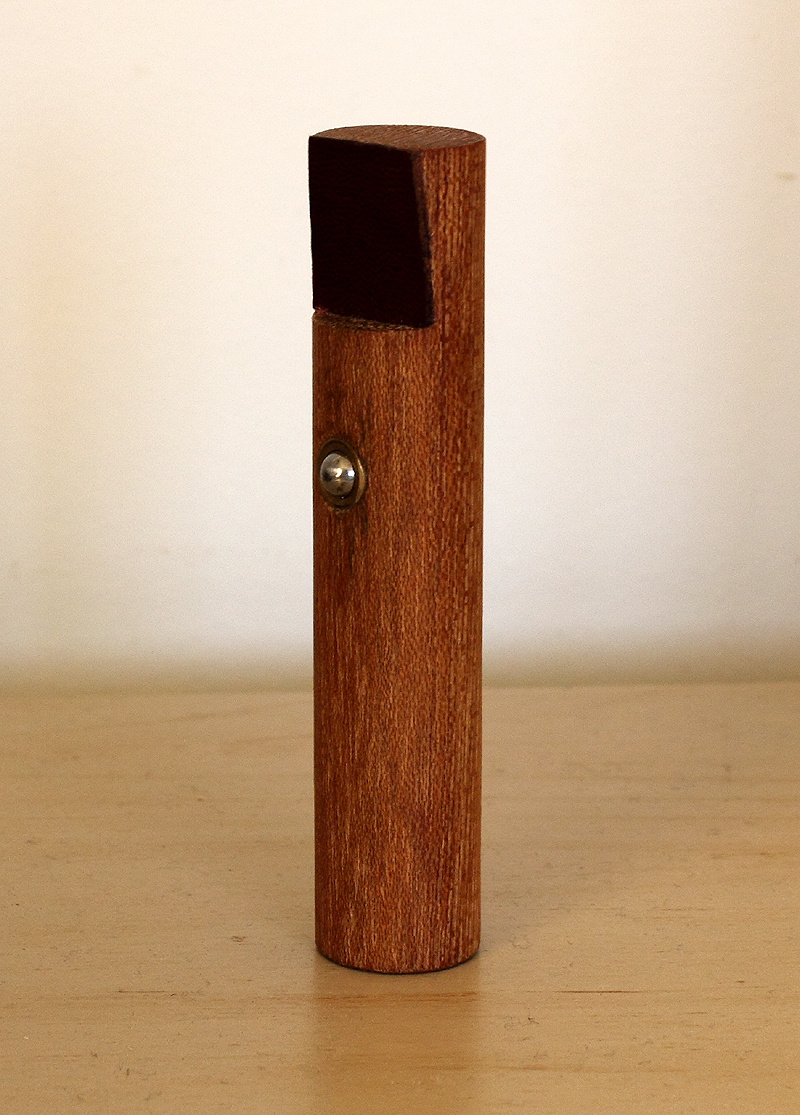
Hardwood bench dogs are better suited to working with wood than metal ones. This solid hardwood bench dog has a 3/4 inch diameter round profile. The round bench dog is intended for use in workbenches with 3/4 inch round holes. A spring-loaded bullet catch is press fit into the sliding part of the bench dog. This ensures that the bench dog makes a solid fit with the workbench hole.

The length of the bench dog is 4.00 inches which is ideally suited to most workbench thicknesses. To ensure positive clamping of thinner stock, a raked flat notch is recessed on one side of the bench dog. Leather is applied to the face of the raked flat face of the notch to prevent wear on furniture components clamped against the bench dog. The bench dog can easily be lowered into the dog hole when not in use, and raised for use.

Hardwood bench dog

The bench dog can be raised to match the thickness of the stock that is being hand-planed, assuming there is a 3/4 inch through-hole in the workbench surface. The hardwood bench dog eliminates the risk of marring the metal sole or blade of a metal-bodied handplane. The hardwood used in the bench dog design is oak.

Handcrafted bench dog  $12.00

Hand Planes…

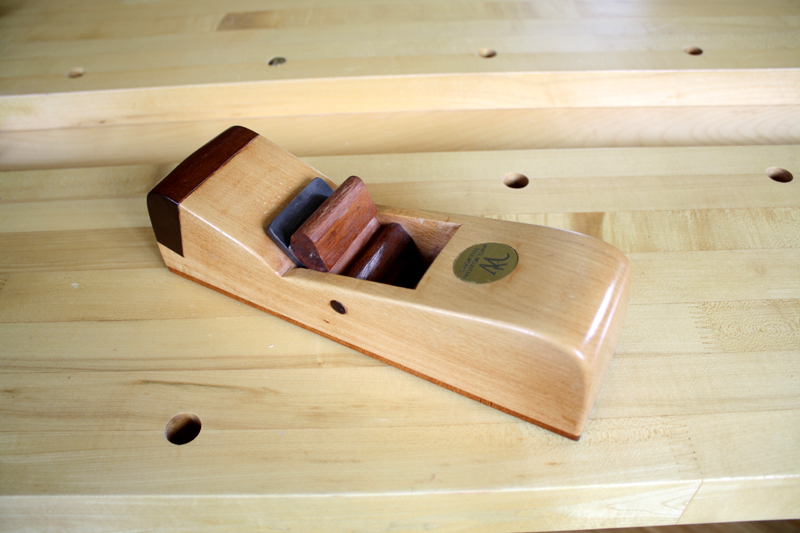
Over the years I have amassed quite a few hand planes in my shop. The hand planes range from early wood and transitional planes to specialty rabbeting planes, block planes, bench planes and jointer sized planes. For a time, I enjoyed restoring old wood and transitional hand planes and would often re-sole the transitional planes with new hardwood soles. I replaced cracked handles with newly crafted ones. I soon found that these early versions of hand planes did not perform as well as modern hand planes even with considerable fettling and tuning. For a period of time, I was crafting my own wood bodied hand planes with modern thick blade assemblies and these performed considerably better as the mouths were tighter.

Wooden Smoother Plane


On to the modern steel-bodied planes. I currently own an assortment of these hand planes primarily from two or three manufacturers and they tend to perform very well as long as the blades are kept sharp. Regular sharpening is key to the performance of a hand plane. Also, adjustments are much more precise on the newer hand planes with either Norris type or Bedrock type setups.

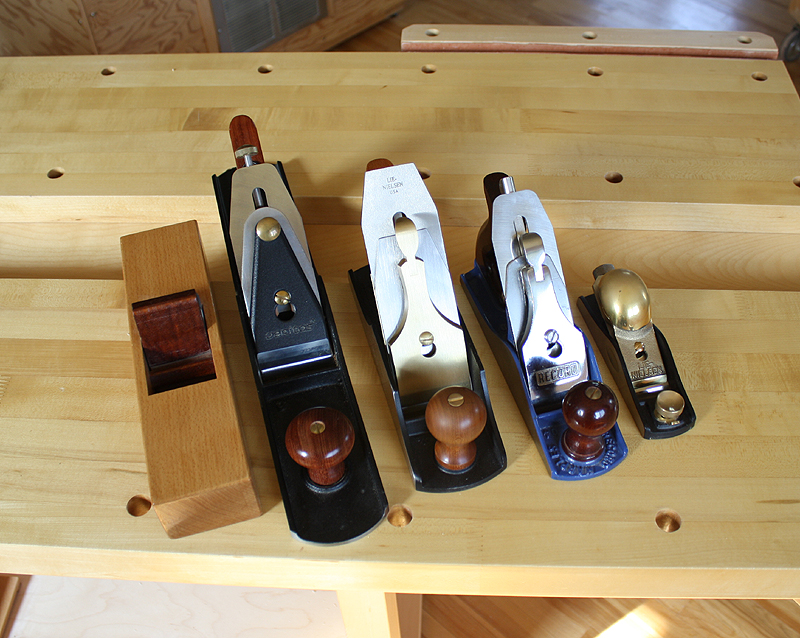
Hand Plane Collection


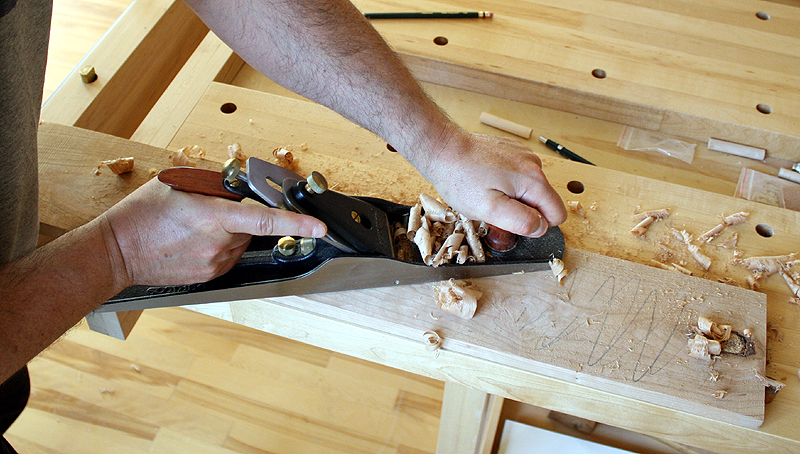
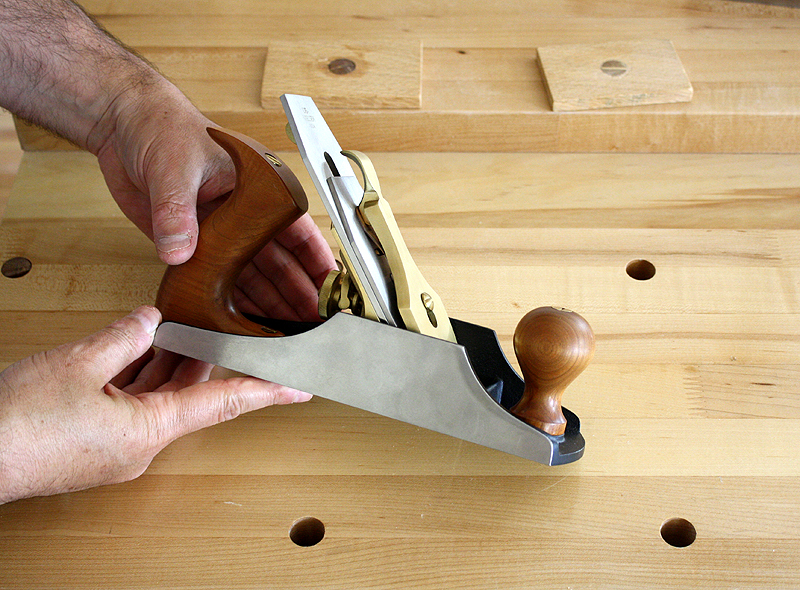
With the considerable assortment of hand planes in my shop, I find I that I tend to reach for the same four planes, These are a No. 4.5, No. 7, Standard angle Block and Lo-angle Block. I very often grab the Standard angle block plane as a small smoother when working on small parts. It works well, is light and easy to maneuver. The bench smoother is a Bedrock type No. 4.5 and is my most frequently used hand plane. The longer No.7 is used to work long edges and flatten boards. The Lo-angle block plane is used primarily for planing across short edges and ends of boards. I reach for some of the other specialty planes when the need arises. The conclusion to all this is that more often than not I find myself reaching for these four hand planes. It is easier to keep these hand planes blades sharp and thus maintain fewer tools. This was not planned but a method of work developed over the years for reasons of efficiency, versatility and speed.

All for now…

Furniture design mockups…

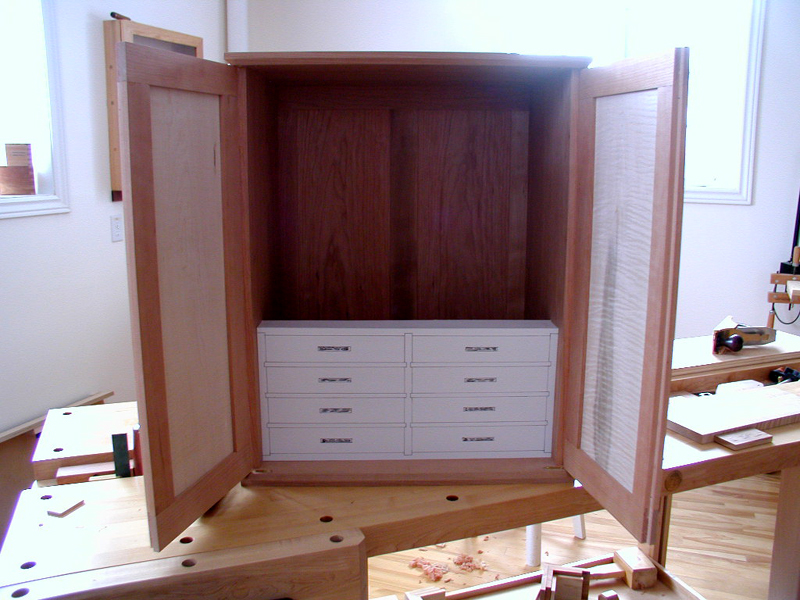
Techniques from the build process of a display cabinet design. After completing the main case of a display cabinet, work began to create the inner drawer case. The first step in the sequence was to get the proportions correct using a cardboard mock up of the drawer case. After a few iterations, the mock up in the photo was the preferred layout. The design considerations which used are as follows:

The height of the drawer case, number of drawers, the width and height of individual drawers.

 Display Cabinet Drawer Mockup

A cardboard mock-up is a very important step in my opinion, as it serves to both provide a visual image of the drawer case and to point out any possible subtle issues with the layout. The drawer case is set back from the edge of the main case to allow for drawer handles and a little extra for the door stops. The drawers can be removed and individually placed on the top of the drawer case for better viewing. I debated whether to overlay the horizontal drawer dividers with the door fronts, but since all the wood is uniform and of the same species ( cherry), I would have the horizontal dividers visible. The components of the drawer case are for the most part dadoed and rabbeted together and the horizontal dividers each slide in between two grooves. The center vertical divider will be permanently attached to the drawer case.

The rabbeted sides will also have a couple of dowels in each of four edges for reinforcement. Since the cardboard mock-up is sized exactly to scale, I have the benefit of using it to size the components of the drawer case for milling and dimensioning. At this point, the boards used for the drawer case are sawn and they are allowed to stabilize before any further processing. This is to remove any inner stresses in the wood. The individual drawers have dovetailed drawer fronts and rabbeted backs and the bottom panel are floating in a small groove on all four sides of the drawer.

Hand Tool Solace…

Interesting facts about using hand tools. Hand tool use usually requires harder physical work than power tools, but they offer a higher degree of skill and concentration in achieving accuracy. Hand tools will always be ensured a place in the workshop due to their compactness and relative economy. In many cases, they provide the quickest solution since they require little or no setup time. Some cabinet making still calls for many operations which machines cannot tackle. The other main advantage to using hand tools is the pure enjoyment derived from them. Hand tools operate in relative quiet, therefore not creating the noisy distractions that power tools can sometimes produce. Hand tools such as chisels and hand planes require sharpening occasionally, which is another skill that needs to be developed.

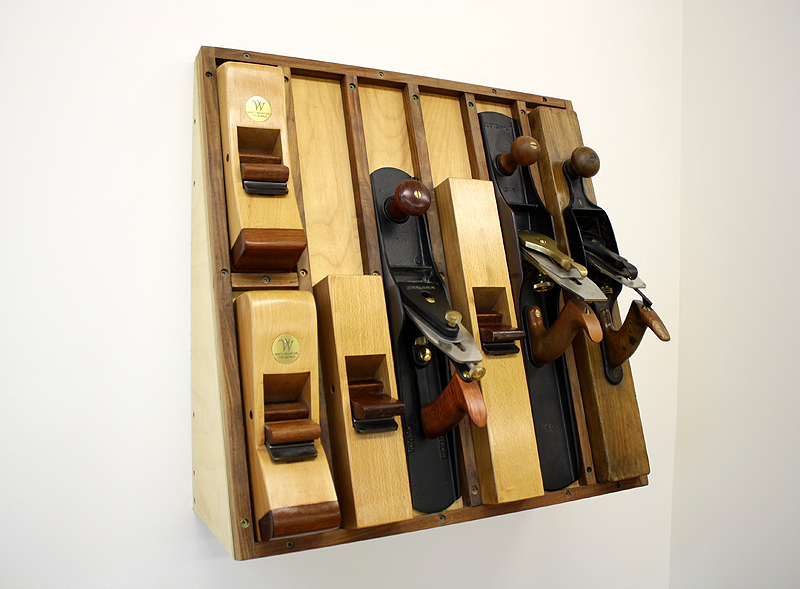
Hand Plane Rack

Hand tools have evolved over the past centuries, and today’s tools are vastly superior in both quality of metal, and manufacturing accuracy. The hand tools of yesteryear remain treasured items though, since there is almost always a story behind a particular tool. Here in my furniture studio I use hand tools as much as possible, due to the benefits of reduced dust and noise levels and the higher degree of fine craftsmanship possible. Most educational programs in woodworking begin by teaching the use and virtues of hand tools. This is done because hand tools are almost essential, and will be needed at some phase of a project. Projects can be built exclusively with hand tools or a combination of hand tools and machine tools.

Hand Plane Basics

Hand Plane Basics

In this tutorial, hand planes and their uses and techniques are presented. Hand planes have been a part of woodworking shops for centuries. Hand plane use can range from preparing or dressing wood, creating joinery on wood to finishing or smoothing wood.

Hand planes are but one tool in the hand tool arsenal which every fine furniture shop should strive to acquire. The first part of the tutorial describes different hand planes and their uses. The range covered is from the more common hand planes to a few specialty hand planes. Following this section is an introduction to hand plane techniques with step by step sequences of more common handplaning operations.

The step by step sequences describe how to create and smooth an edge joint on a board, how to dress a rough board to a predetermined thickness and flatness. Block planes are covered with steps on planing the end of a board as well as creating a chamfer along an edge.

No. 4 Smoother Plane

Workshops can be either machine oriented or hand tool oriented at the other extreme. Hybrid workshops benefit from both machinery and hand tools. I favor workshops which utilize machinery to process raw wood and then use hand tools in the later stages of furniture making.

Very often, it is quicker to tune or create a joint using a hand plane rather than go to the trouble of setting up machinery to perform the same task. The dust free, quiet environment which hand planes provide is a large advantage for the small shop. This tutorial will answer many questions you have about hand planes and their use in the workshop. I use hand planes extensively in my furniture making workshop. Instead of unhealthy dust, I generate wood shavings and get exercise! After following the tutorial with the included videos, you will have a good understanding of what to look for when selecting and using hand planes.

Hand Plane Basics Tutorial  $14

Stanley 45 Comb. Plane (free)

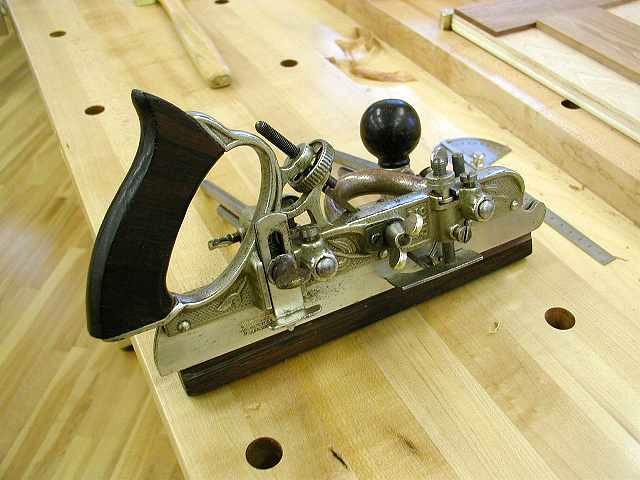
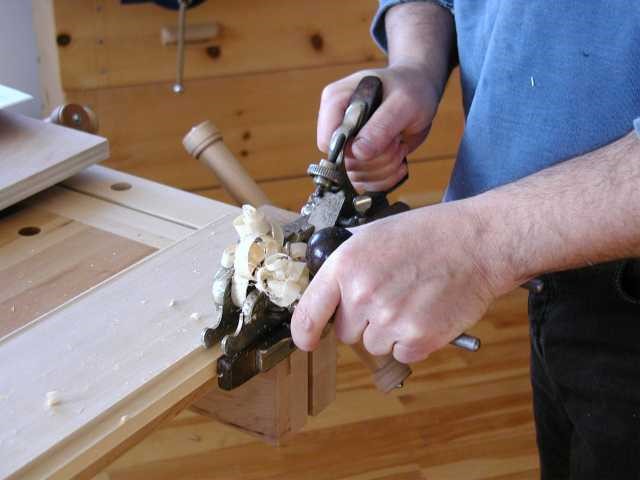
Vintage Stanley combination planes have always intrigued me. Hand plane technology progressed through the centuries with wooden planes making way for metal-bodied planes. Molding, grooving and dado planes, including plow, dado, beading, etc., have historically been dedicated wooden planes with the profile and pre-set offset from the edge of the board built-in. This translated to having a different wooden plane for each application, and could get cumbersome for the cabinetmaker of the time.

The Stanley No.45 and No.55 combination planes were at the end of the evolutionary line of hand planes. Stanley developed this combination plane with an adjustable fence which is capable of accepting an assortment of straight blades, beading planes, and match groove blades. The design removed the need for multiple wooden planes for different sized grooves, dadoes, rabbets and beads.

Stanley 45 Combination Plane

This particular series of plane, the Stanley No. 45 – 55, was developed at the peak of the metal hand plane design era ( late 1800’s). It is interesting that if one were to develop a similar-featured plane today, the design would probably look not too much different than the Stanley No. 45. This particular model, the Stanley No. 45 has been in production from the late 1800’s to the middle of the 1900’s with many different variants along the way. Each variant was either adopted for manufacturing efficiency or to implement a new feature into the plane.

The type I have ( Type 7B) is very likely early 1904-06 vintage. The Patrick Leach “Blood and Gore” web site is a great place to visit and determine what vintage your old Stanley or Record plane is. Certain small features are either part of this plane or not, enough to narrow down the production dates of Stanley planes to within a few years of each other.

Stanley 45 Combination Plane

Stanley 45 Tutorial – Free

Jewelry Box Build (free)

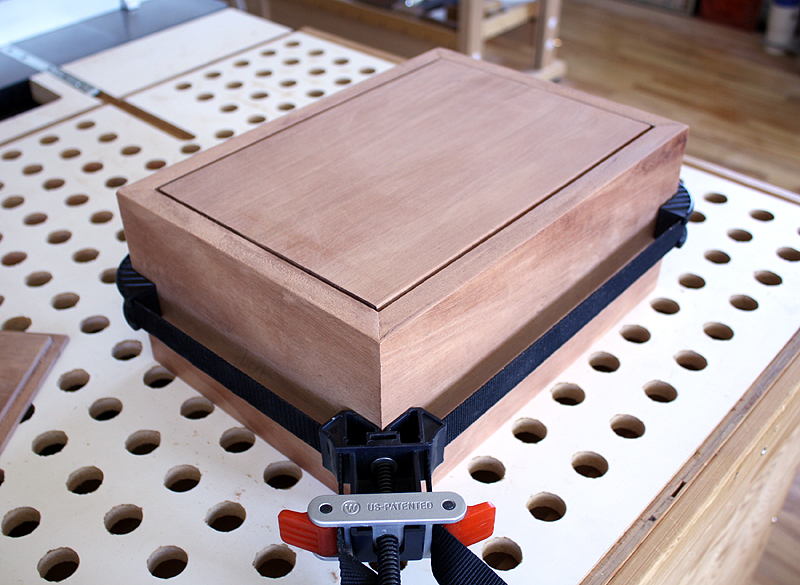
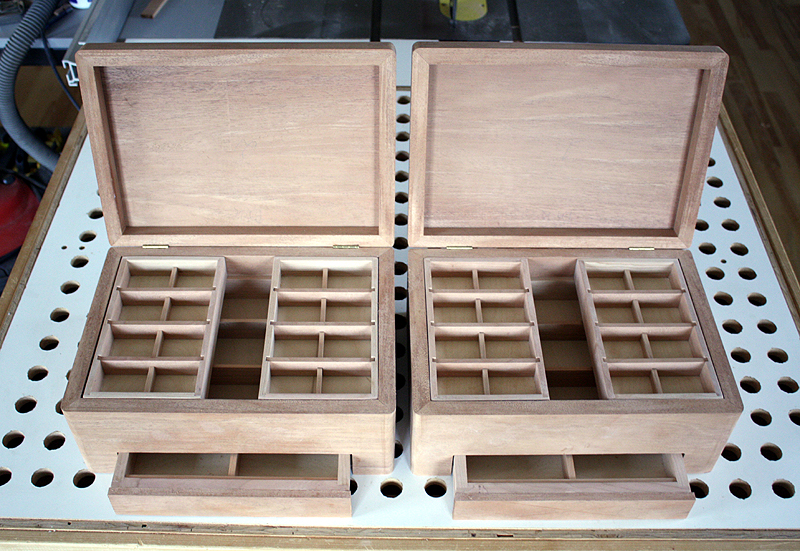
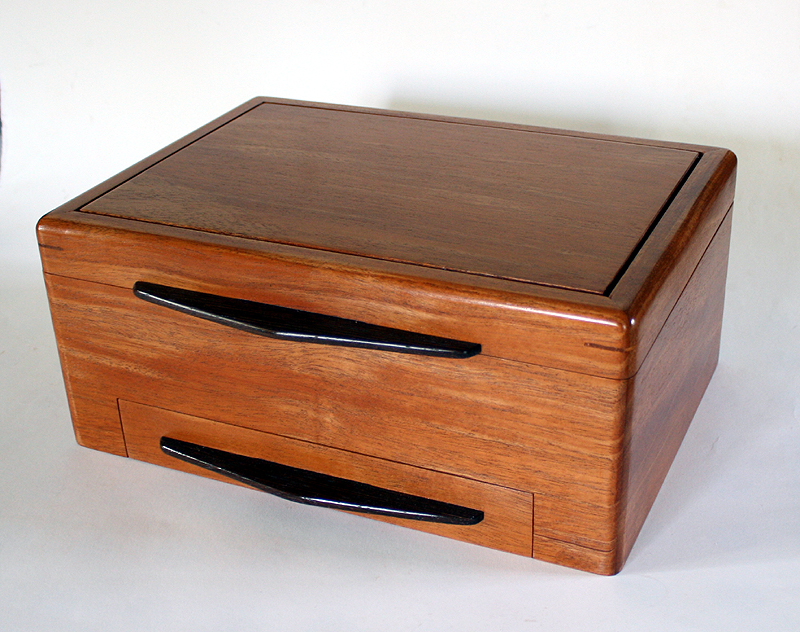
A glimpse into the build process of White Mountain Design signature jewelry boxes is shown in this article. Each drawer, tray and compartment divider is individually fitted to accommodate the overall jewelry box dimensions. The bottom drawer glides along rails on either side of the drawer opening, the drawer has corresponding grooves.

Each compartment divider can be removed to allow for a larger compartment and to accommodate larger pieces of jewelry. The sliding trays allow you to view the contents of the compartments below . In the fitting process, individual pieces are hand planed to tolerance. Clamping the jewelry box together and final assembly shown here.

Jewelry Box Build

Creating jewelry boxes in multiples and completed jewelry box shown below.

Jewelry Box Build

Completed Jewelry Box


Complete article on the Jewelry Box Build available in the new
WOODWORKING: FROM DESIGN TO MAKING
available in the BOOKS section.

New furniture designs…

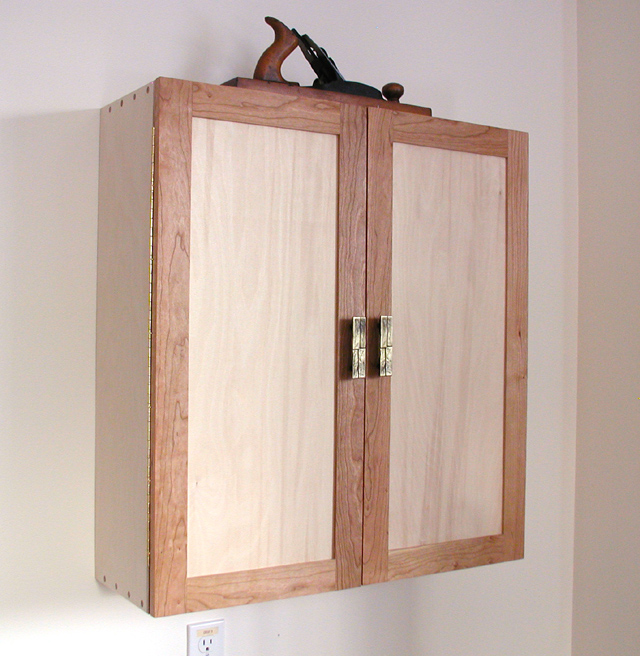
Shop-made tool cabinet

I’ve spent time recently sketching some new designs for furniture. What I like to do is put pencil to paper and just let the creative juices flow. Ideas beget ideas and the iterative process of fleshing out an appealing furniture design begins. Some of these ideas will be technically challenging but I don’t let these details get in the way of the initial sketching. The existing skill set of a furniture maker can influence the designs they create. I strive to avoid this influence and instead concentrate on the design aspect. The skills and knowledge needed can be seen as a challenge, but maybe this is what drives us to be better furniture makers. Staying in the comfort zone of creating work you are technically familiar can keep you from developing new skills and knowledge.

I’m not going to get into these particular designs as I have yet to draw them in both orthographic and perspective views. I’ll pick and choose from the sketches and continue to render the designs into drawings. Of course, the material comes into play and this can influence the design somewhat. For example, if I intend to use wood with particular graphics on a cabinet door, the dimensions of the material (wood) can limit the size of the door(s) especially if the door is a frameless design. Door size then impacts the width and height of a cabinet.

This brings up the debate about beginning a design with particular wood(s) in mind or to focus purely on the design and worry about materials afterwards. In reality, it is a bit of both. I design with material in mind but somehow work the proportions of the furniture around the availability of this wood. The primary objective, however, is the implementation of the design. Substitute woods can always be acquired if necessary.

Once I’ve finalized a design, I move on to creating a maquette for the design.  A maquette is the miniature rendering or scale model of the furniture. This part is actually fun and gives a better idea of the proportions and how the individual components of the furniture piece work with and are scaled to one another. In the end, the design of the furniture needs to be in harmony and balanced although not necessarily symmetric in form. With the price of wood nowadays, it becomes increasingly important to get these designs right. Efficient use of wood or acquiring the most yield from boards is a criteria in my furniture making. The resawing of wood boards into veneer slices is often use to acquire maximum yield for hard to come by figured woods.

Dynamic design…

Over the past two years, I have come to use a new term in my design philosophy. The term, “dynamic design”, allows me to modify a design to adapt to circumstances, for either technical considerations, or for purely aesthetic reasons. This is a term I have coined to describe how design doesn’t necessarily need to be cast in stone and can instead be modified as a project progresses. The changes I refer to can be either subtle changes or large scale changes. One of the meanings for the word “dynamic” from the American Heritage Dictionary.

dy·nam·ic – Characterized by continuous change, activity, or progress. As my studio furniture is being created, sometimes the design I originally envisioned can be improved at different stages, or the original design can remain as is. Having this flexibility provides a continuous excitement for the  studio furniture maker along with the benefit of improvising on the original design after seeing the wood art at various intermediary stages. An excellent example is a console table design I worked on over a year ago. I had chosen to invert the base of the table for both aesthetic and technical reasons. This isn’t to say that the original design of the maquette would not have worked. Inverting it simplifies a design dilemma for me and introduces a new aesthetic to the piece. After creating the maquette, I realize I needed to have a fairly stable, strong sub-base to be able to support the V-shaped arch, whereas inverting the base utilizes the points of the arches as legs. Often, we become fixated on a particular design and don’t bother seeking out alternatives which often stare us right in the face.

Case in point, I have been creating a new design for a smaller piece of furniture, and as part of my philosophy I strive to use as many materials in my possession as possible, without continuously sourcing new material for the components. Working with material at hand sometimes limits what I can do, but on the other hand challenges me to work within certain constraints, in this case certain materials. This is an instance of what I like to call “dynamic design”, often the beauty of a design is also in its simplicity. Simplicity is one of the tenets of the minimalism philosophy. I have to admit that I am a fan of “minimalism”, and have read one book on the subject so far. You tend to gain a different perspective on design after being exposed to the philosophy of minimalism.

Sliding Miter Sled Plan

Sliding Miter Sled Plan

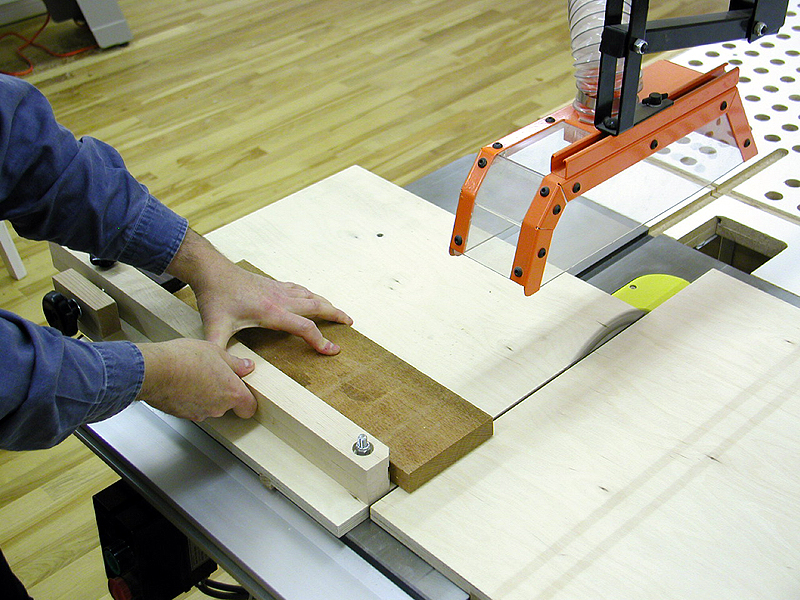
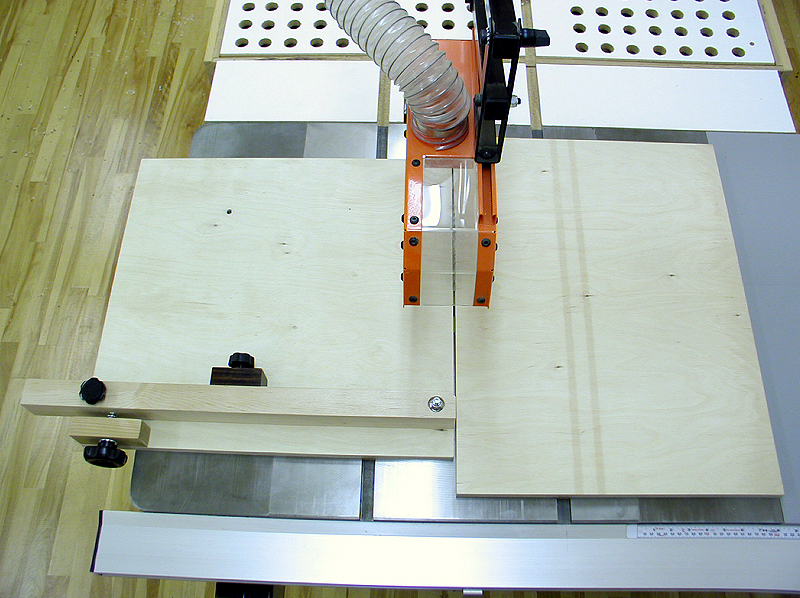
The table saw sliding miter or crosscut sled is shown in its various configurations. Cross-cutting on the table saw very often demands high precision. The miter gauge provided with most table saws can be very limited in its versatility. There is little bearing surface provided for the piece being crosscut, and there is friction created by moving the piece and miter gauge across the table saw top. This friction can often reduce precision since a large part of your effort is concentrated in keeping the piece from sliding left or right and from rocking.

A sliding miter sled or crosscut sled addresses these issues by providing a secondary surface to which you can rest the piece being crosscut. Once you have locked the piece against the fence of the sliding miter sled, you only need to move the sliding table past the blade to perform a very accurate crosscut.

Shown is a sliding miter sled with adjustable fence and to the right is a fixed auxiliary table. The auxiliary table keeps offcuts from falling onto the table top and binding the saw blade causing kickback. The sliding miter table and auxiliary table both have hardwood runners attached which are sized to the length of the table saw miter left and right miter slots, serving to align both sides of the miter sled parallel with the saw blade. Having both the sliding table and auxiliary table in close proximity to the blade also serves as a zero clearance setup for your cuts.

1. Micro adjustable zero setting
2. Make safe and accurate crosscuts
3. Increase crosscut capacity of your tablesaw
4. Lightweight, easy to install and remove

Sliding Miter Sled Plan

Comprehensive information, construction techniques, large photos and (20) detailed computer designed illustrations (CAD) to build this sliding miter sled with microadjust are included when you purchase this plan.

Sliding Miter Sled Plan  $14

Display Cabinet Plan

Display Cabinet Plan

In this tutorial I document the design and build of a veneered display cabinet. This contemporary styled display cabinet has been inspired by James Krenovs’ collective work. James Krenov is widely known for his classic cabinets on stand as well as the incredible attention to detail he brought to furniture making. He also brought a unique philosophy and vision to furniture making of which I heed and practice. A large part of this veneered display cabinet has been created using an assortment of hand tools although some machinery is used in the initial wood preparation stage.

The following topics are covered in detail in this 100 page design and build tutorial:

– Display Cabinet (considerations, parameters involved in the design)
– History of Furniture Design (evolution of design through the centuries)
– Tools, Joinery and Wood used in this build ( Hand tools, techniques)
– Display Cabinet ( step by step build sequence)
– Veneering concepts ( how to veneer, advantages of veneering)
– 35 (CAD) drawings and illustrations included to build display cabinet

The step by step sequences in the form of text and photography describe how the design of this display cabinet originated and the design considerations in its build. Information on wood selection and preparation as well as the joinery used in this cabinet is covered. Tips and techniques acquired over several years of creating this style of cabinet are passed on in this tutorial. The process of creating and applying veneers is covered in this tutorial as well as information on the installation of knife hinges.

Detailed photos and information, display cabinet plans, and over 35 detailed computer designed illustrations (CAD) on how to build this display cabinet are included when you purchase this plan.

Display Cabinet Plan


Start Your Own Woodworking Business book

Start Your Own Woodworking Business book

Upon my return from IDS15 in Toronto I needed a day or two to catch up on the many emails I received during my time away. I also had other business to tend to during the first few days of my return. Then a much needed break for a few days to recharge myself. I typically do this after an intensive period. IDS15 preparations and doing the actual show demanded considerable energy, so I feel I was entitled to a break afterwards.

The interesting part about these breaks is that it foster new ideas in my mind. I had nothing on my plate so to speak and this causes the ideas to flow.  With a previous goal to publish an e-Book in mind, I decided to pursue this. Expanding on an earlier publication of mine; the result is my first e-Book with much more content and images. I am glad to share the topics and issues I have experienced in the startup of four woodworking related businesses. So the newly released Start Your Own Woodworking Business book is hot off the press and available through WoodSkills !

Cabinet Backs…(create elegant frame and panel backs)

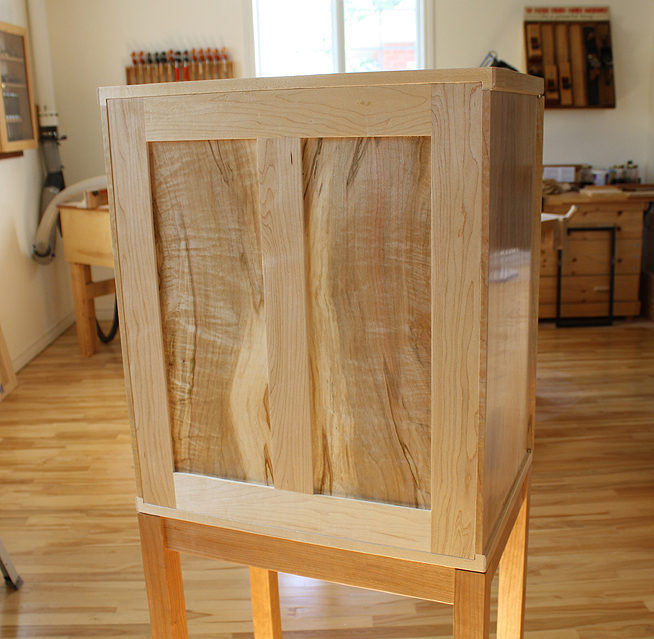
A portion of my cabinet design and build process involves the creation of a cabinet back. Conventional wisdom says the back of a cabinet is not nearly as important as the front or sides, so it merely needs a panel which is rabbeted into the sides, top and bottom. The problem with this thought process is the assumption that the back of the cabinet will be placed against a surface or wall and not seen. This doesn’t apply to all cabinets as many cabinets are designed as showcase cabinets and placed away from walls; sometimes placed in the center of a room or even a foot or two away from a wall. Something also feels wrong about diminishing the importance of the back of a cabinet when so much emphasis is placed on the design and structure of the front and sides of the cabinet. With this in mind, the need for a more aesthetically pleasing cabinet back becomes important, along with the function that it introduces to the cabinet. An example of function is a wall-mounted cabinet that needs a structurally strong back.

Display Cabinet Back

The resulting back panel which best meets the criteria of both aesthetics and function is the frame and panel back; a panel inset into a surrounding frame composed of rails and stiles. The frame and panel back is inset into the cabinet back much like a conventional panel would but it also provides some rigidity to the cabinet. In the situations where a single panel is too wide, a middle stile is installed to divide the frame into two halves; otherwise for smaller cabinets a single panel is sufficient. The panel itself can either complement or contrast the cabinet, providing an interesting focal point once the doors of the cabinet are opened, as well as drawing the eye to the pleasing back of the cabinet.

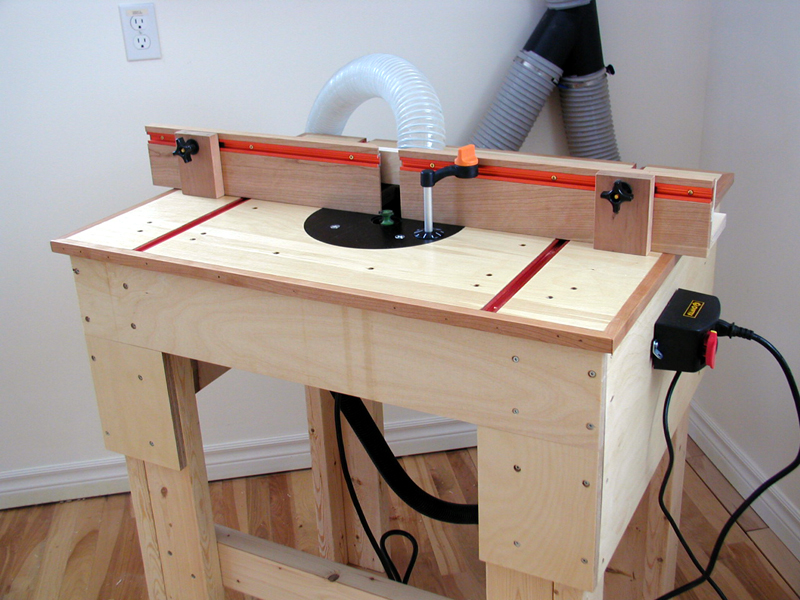
Router Table Plan

Router Table Plan

This versatile, easy to build router table has the following dimensions, 32 inches wide and 24 inches deep. The router table plan dimensions can be changed to suit your requirements. The router table insert is offset towards the front of the table since this is where most routing is performed.

The router table plan also provides use of the rear of the table when a larger table surface is required. This is performed by simply flipping the fence around and routing on the other side. An optional crosscut sled allows you to safely rout at right angles to the table. To eliminate table sag, the router table top is a torsion box with glued and screwed internal supports or webbing. The T-tracks provide the fastening and adjustment of the adjustable fence. The router table top is 3/4 inch thick.

The features of this router table plan are:

– optimized table height
– table dimensions for large and small work
– easy to build using standard dimensioned lumber
– table sag eliminated with torsion box construction
– fence orientation is flexible on table top
– excellent dust collection
– router accessible from top or bottom
– router can easily be removed for hand held use
– router bit height can be adjusted from table top
– rigidity and mass incorporated in table
– crosscut sled plan included

A Veritas circular router base plate kit was selected to mount a router. This router plate kit offers rigidity, ease of router installation, and removable from beneath the table. The low cost router plate kit, excellent directions for mounting a router, and a small 9 in. diameter footprint are also design factors. A router of your choice can easily be substituted. Included in the plan are:

1. Router table plan with detailed build sequence and 25 CAD illustrated drawings
2. Versatile crosscut sled plan.
3. Easy to build using dimensioned lumber.
4. Torsion box construction method for a sag-free table surface

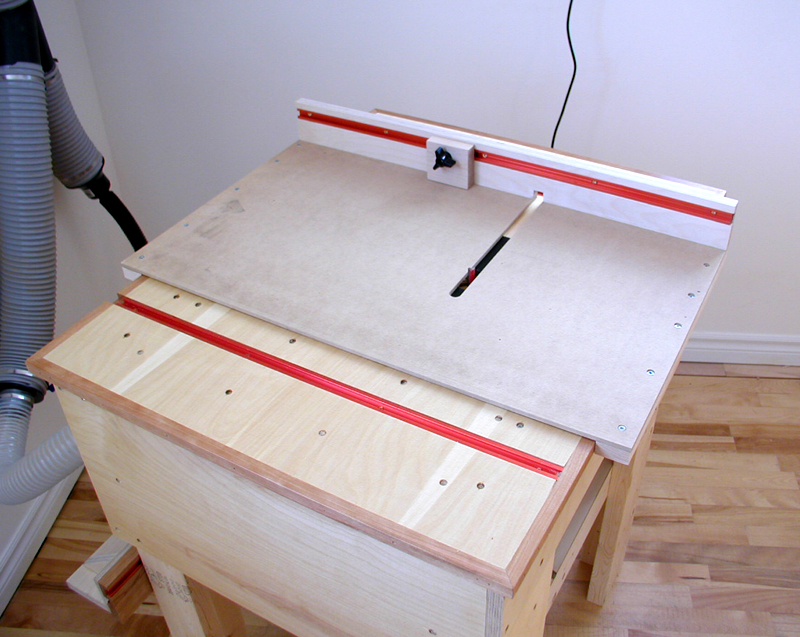
Router Table Crosscut Sled

Comprehensive information, construction techniques, large photos, video and (25) detailed computer designed illustrations (CAD) to build this router table and crosscut sled are included when you purchase this plan. The included video also provides you a better understanding of routers.

Router Table Plan  $14

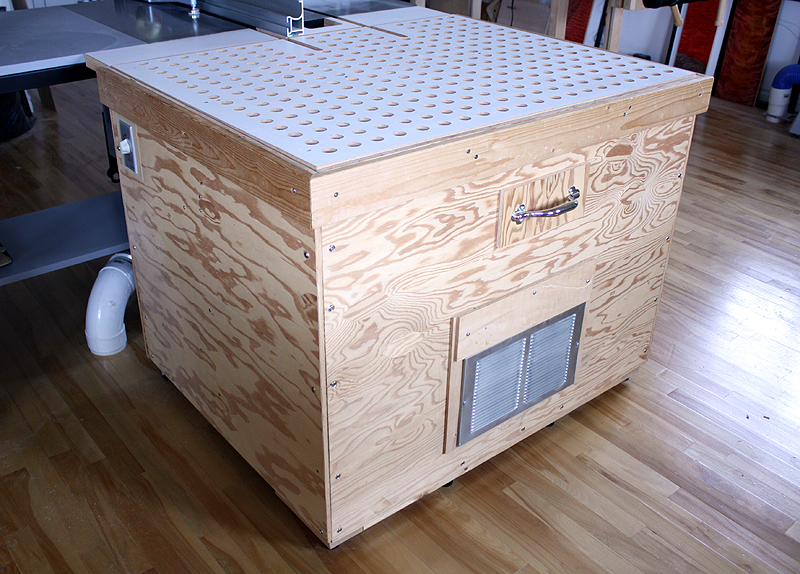
Downdraft Table Plan

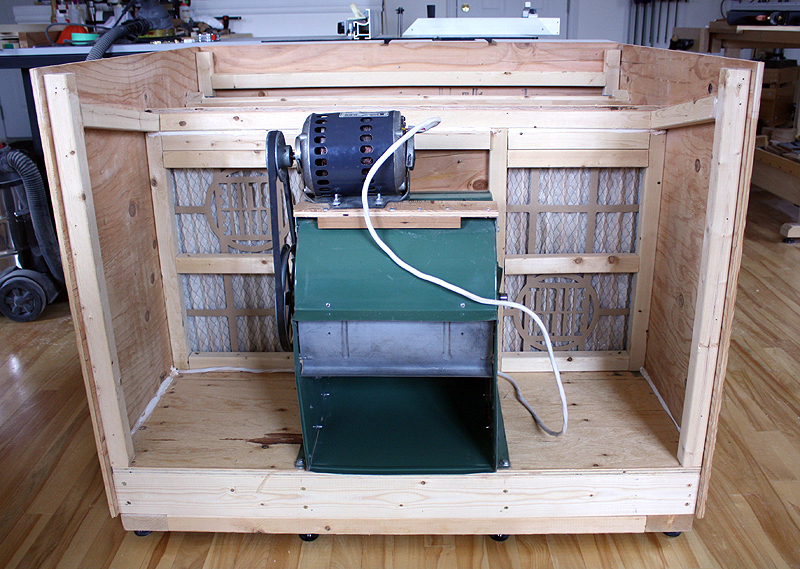
This downdraft table plan offers the design of a combined downdraft and table saw outfeed table. This downdraft table also serves as a whole shop air cleaner if run periodically during the day when significant airborne dust accumulates in the shop. The downdraft table plan is designed to be an integral part of a table saw with dual miter gauge slots and a blade guard opening.

Downdraft Table Plan

An extension is attached to the downdraft table to provide greater capacity for ripping and to allow a factory blade guard to be used with the downdraft table. The table is easily separated from the table saw for maintenance. The downdraft table is also designed to be used as a powerful, effective whole shop air cleaner. A heavy-duty handle at the front enables the downdraft table to be moved for maintenance.

1. Over 30 detailed CAD drawings and illustrations included to build and use this downdraft table plan
2. Also included is a plan for an easy to build jig to drill precise, evenly spaced holes on the table top
3. Versatile downdraft table is a combination outfeed table, whole shop air cleaner and downdraft table.

Detailed photos and information, downdraft table plans, and over 30 detailed computer designed illustrations (CAD) on how to build this downdraft table are included when you purchase this plan. Also included, a detailed plan to build a small jig to create multiple accurately spaced holes on the table surface.

Downdraft Table Plan  $14

Shooting Board Plan

Follow our shooting board plan and make your own shooting board. Getting the perfectly square joint is often difficult to achieve with the tools and machinery we have available to us. One or more bad adjustments can multiply and instead provide us with a close but not perfectly square joint or miter. This shooting board plan was created to be able to easily make your own shooting board. to ensure.

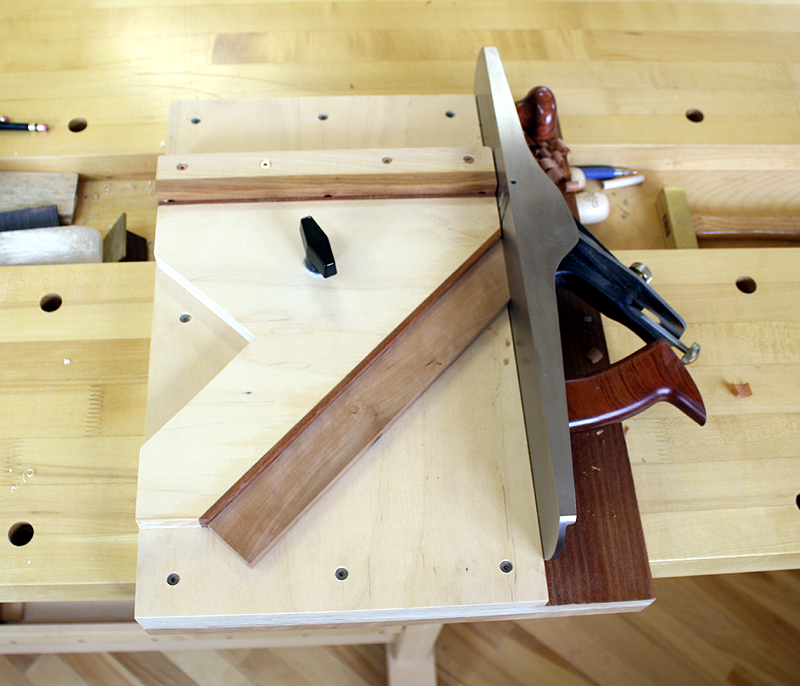
The shooting board was developed over a century ago to ensure that corners and miters on smaller boards are square. The shooting board is especially suited to thinner work which cannot be hand planed easily due to the narrow bearing surface. A good example of narrower stock is the components of a small drawer for a jewelry box or a drawer for a small cabinet. Another example is the face frame of a small cabinet with thin, narrow rails and stiles.

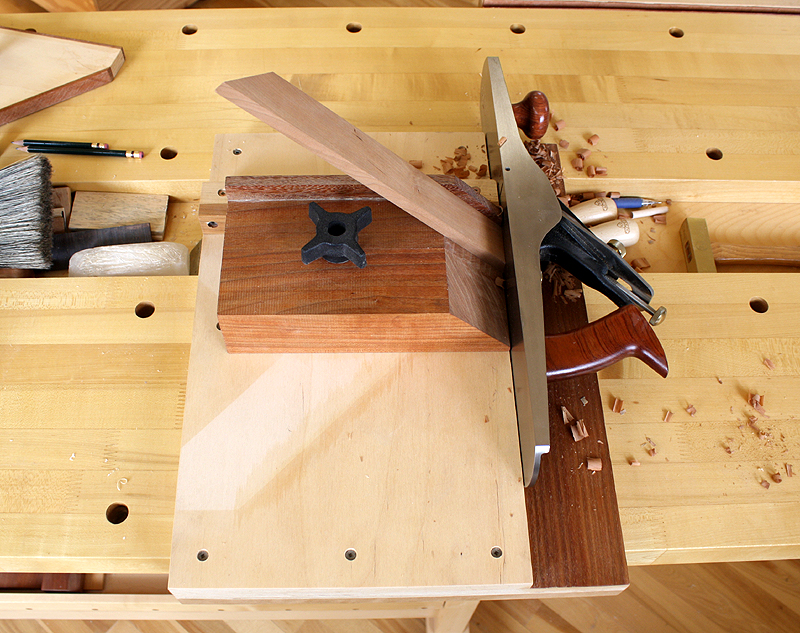
Shooting boards can be assembled to be as simple as possible or assembled with a few extra features which make it a greater pleasure to use. In the photo below there are two attached levels of baltic birch plywood, with the top level (baseboard) being narrower than the bottom. This creates a lower runway at the right which enables the side of the hand plane to have a surface to glide on and be guided along from the front to the back of the shooting board as in the second photo below. An edge miter is being trimmed using the edge miter attachment.

Shooting Board Plan

The shooting board plan has a fence installed onto the baseboard of the shooting board. This fence provides both a stop and bearing surface for the small piece we wish to square or miter. The fence must be perpendicular to the path of the hand plane sole, as this is what determines how square the end of the board is in relation to its’ long edge. The fence is attached with screws and can be adjusted in the future for wear. This set up allows the adjustment of the dark hardwood face enabling the fence to be perfectly perpendicular to the edge of the shooting board runway, without needing to remove the fixed portion.

Comprehensive information, shooting board techniques, large photos and (10) detailed computer designed illustrations (CAD) are included with your shooting board plan purchase. Descriptions and illustrations of both face and edge miter attachments are also included.

Shooting Board Plan  $14

Dovetail Jig Plan

Dovetail Jig Plan

With our dovetail jig plan you can make beautiful and striking woodworking dovetail joints. The dovetail joint is very often associated with quality woodworking. It is both a structurally strong and aesthetically pleasing form of joinery. Dovetail joinery is often used in case construction and for drawer construction, specifically drawer fronts as it is a very strong, interlocking joint. Although dovetail jig plans are available to create dovetail joinery, most if not all of these dovetail jigs involve powered tools. The hand cut dovetail offers unparalleled beauty in that any dovetail layout is possible.

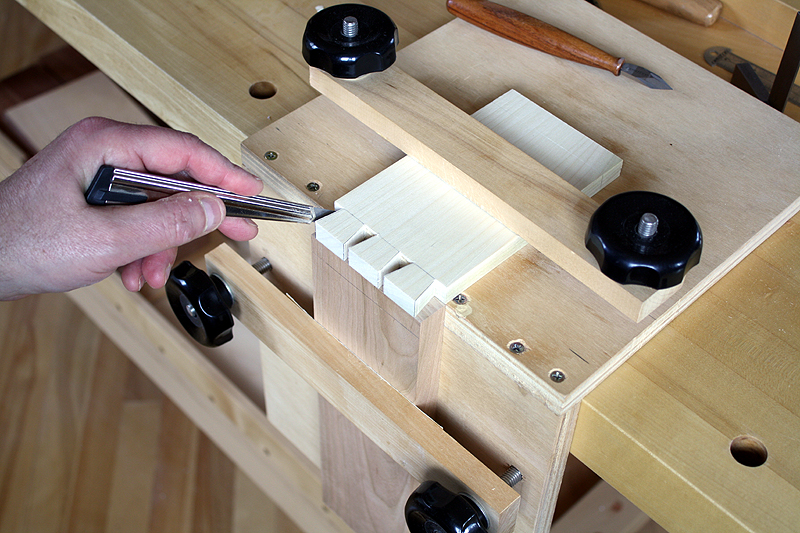
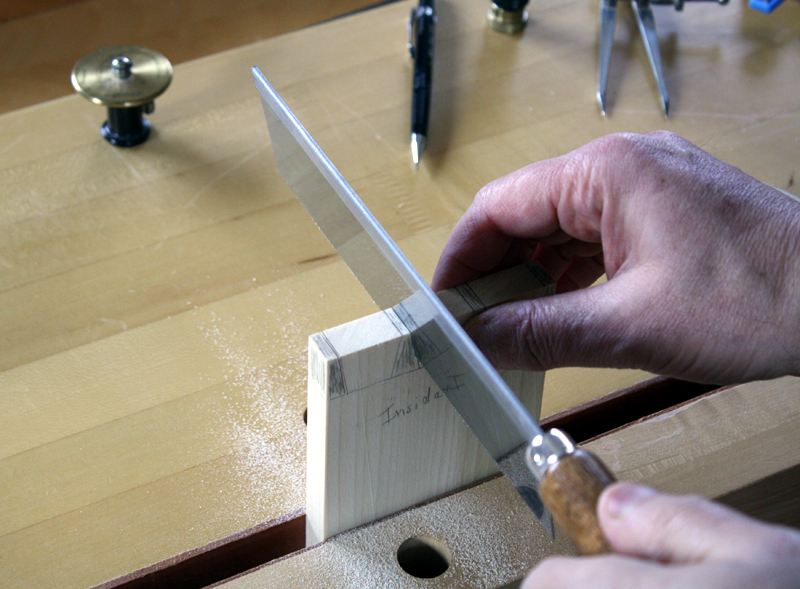
Dovetail joints are composed of mating pins and tails. In the photo below the tails are horizontally oriented in a dovetail jig. Creating dovetails by hand using a dovetail saw, chisels and marking tools, provides the flexibility to lay out tail and pin spacing more suitable to the drawer or case piece being constructed. The dovetail jig below is designed to enable you to accurately create hand cut dovetails. This jig can easily be built from the plans available below and provides excellent accuracy, ease and precision in the creation of hand cut dovetails.

Dovetail Sawing

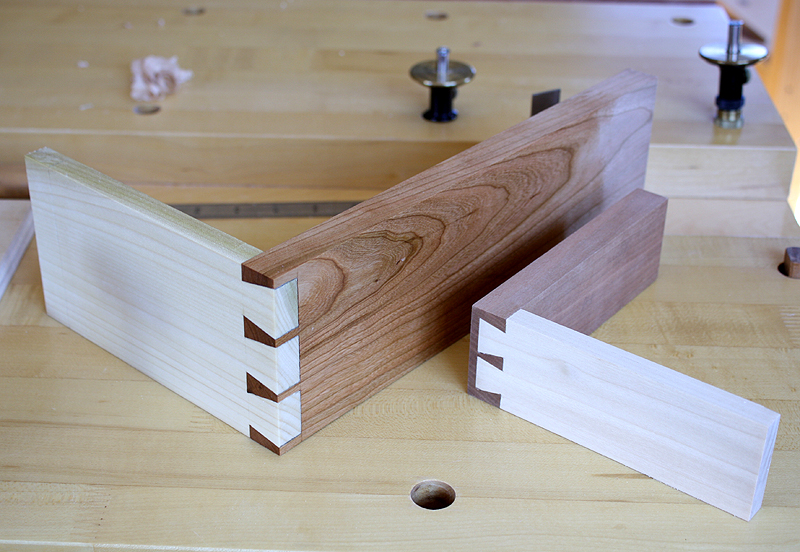
The dovetails in this tutorial and plan are created exclusively with this dovetail jig and hand tools. The contrast created with a lighter tail board and a darker pin board is striking. In drawer construction, the thicker piece can easily be a drawer front whereas the thinner piece is typically the drawer side. As mentioned earlier, the spacing and width of the individual pins and tails can easily be customized to suit the piece when crafting hand cut dovetails.

An assortment of hand tools are used in the creation of hand cut dovetails. Typical tools include layout and marking tools, chisels, a dovetail saw, a mallet, etc. Laying out and marking are of utmost importance in creating precision dovetail joints. Accurate transfer of the tail layout to the pin board ultimately determines how tight and gap free a dovetail joint will be. After following this tutorial which includes a video, you will have a good understanding of dovetail joinery.

Completed Dovetail Joint

Comprehensive information, dovetail jig plans,70 pages, over 100 photo sequences and video on how to create hand made dovetails using this dovetail jig. (14) detailed computer designed illustrations (CAD) on how to make this dovetail jig are also included when you purchase this plan.

Dovetail Jig Plan  $14

Hardwood bench dog

I have been successfully using these hardwood bench dogs in my furniture design+build studio for 8 years. Hardwood bench dogs are better suited to working with hand tools than metal dogs. This solid hardwood bench dog has a 3/4 inch diameter round profile. The round bench dog is intended for use in workbenches with 3/4 inch diameter holes. A spring-loaded bullet catch is press fit into the sliding part of the bench dog. This ensures that the bench dog makes a solid fit with the workbench hole.

The length of the bench dog is 4 inches which is ideally suited to most workbench thicknesses. To ensure positive clamping of thinner stock, a raked flat notch is recessed on one side of the bench dog. Leather is applied to the raked flat face of the notch to prevent wear on furniture components clamped against the bench dog. The bench dog can easily be lowered into the dog hole when not in use, and raised for use.

Hardwood bench dog

The bench dog can be raised to match the thickness of the stock that is being hand-planed, assuming there is a 3/4 inch diameter through-hole in the workbench surface. The hardwood bench dog eliminates the risk of marring the metal sole or blade of a metal-bodied handplane. The hardwood used in the bench dog design is oak. Oiled finish.

“Your work is beautiful.  I received them in good order and they are beautiful.”  Thanks, Larry Kerr MD


How to Inlay

In this tutorial the techniques for inlaying wood are presented. The art of wood inlay has been a part of furniture making and woodworking for centuries. Wood inlay can be used to enhance the appeal of furniture or wood objects by making plain panels of wood much more visually appealing.

How to Inlay

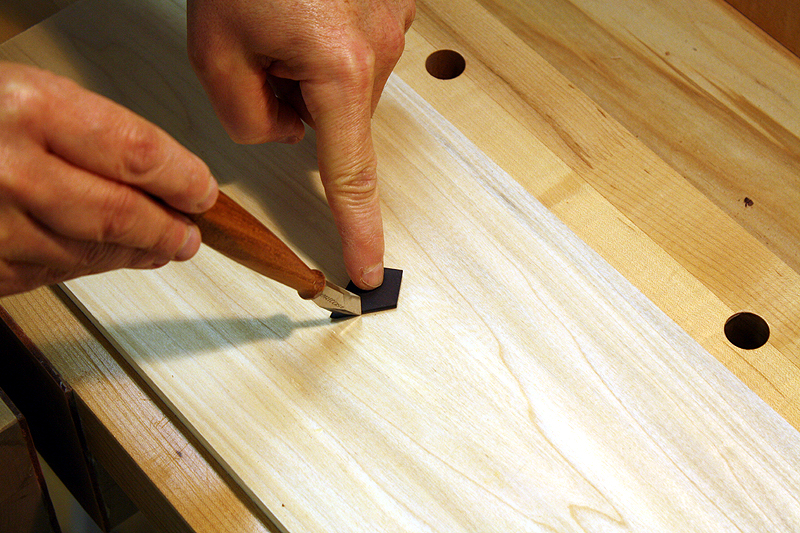
Although inlay can be intimidating at first, after following this tutorial and some practice you will be comfortable using inlay in your work. The first part of the tutorial describes the concept of inlay and selecting contrasting woods as a method of inlay. The next part of the tutorial describes the concept of preparing and cutting inlay followed by step by step sequences to create the mortise for the inlay and inserting the inlay. Afterwards, the technique for handplaning and scraping the inlay flush with the surface of the surrounding wood is described and demonstrated.

The step by step sequences describe how to create the inlay, create the mortise for the inlay, insert the inlay and finish the panel. The inlay will appear to be seamless within the panel when completed. Since there is extensive chisel work when creating and applying inlay into wood, we also include a video on chisels as part of this tutorial.

This tutorial will answer many questions you have about inlay and how to apply it. I use inlay extensively in my own furniture making. The inlay adds beauty to furniture and enhances its aesthetic. After following this tutorial which includes video, you will have a better understanding of how to use chisels to both create inlay in wood as well as in your woodworking.

How To Inlay Tutorial  $14


Bench Jigs

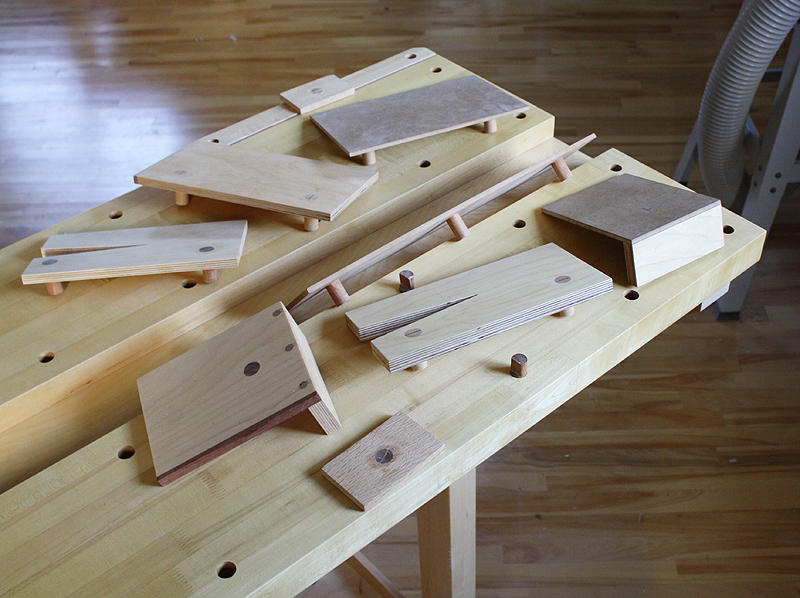
In this tutorial I discuss and demonstrate these time-saving, simple to make jigs for the workbench. I designed and created these jigs over a period of a year to aid me when hand planing boards. All of these jigs are designed to plug into a workbench with round dog holes. In the tutorial I show you how to locate and transfer the holes when making the jigs. The typical dog hole diameter of workbenches is 3/4 inch, which is a standard dowel size. This make is easy to acquire the components to be able to create these jigs.

Bench Jigs

The jigs are quick to install and remove from a typical workbench. The layout of the dowels is such that only one row of holes is necessary. One of the planing stop designs uses a clever arrangement which wraps the jig aroundthe edge of the bench to create a extremely strong and solid connection. Another jig is the bird’s mouth jig which greatly simplifies the process of hand planing the edges of a small to medium board.

The jigs are made completely from wood to reduce the likelihood of damage from accidentally sliding the sole of a hand plane across the top surface of the jig. The thickness of the jigs is also variable and can range from as thin as 1/4 inch up to 3/4 inch. The jigs are also designed to be adjusted higher on the bench when thicker boards are being hand planed. For example a 1/4 inch thick planing stop jig can be raised to accommodate a 1/2 to 3/4 inch thick board. Alternatively, you can create more than one of these planing stops to accommodate different thicknesses of boards.

A step by step demonstration of using each of the jigs in provided in the tutorial as well as plans to be able to create these jigs. Once you are familiar with laying out and creating these jigs, you will find it straightforward to create more specialized ones for your own workbench.

Comprehensive information, bench jig plans, 70 pages and over 100 photo sequences on how to create and use these bench jigs. (18) detailed computer designed illustrations (CAD) on how to create these bench jigs are also included when you purchase this tutorial.

Bench Jigs Tutorial  $14


Hand Planing Stops

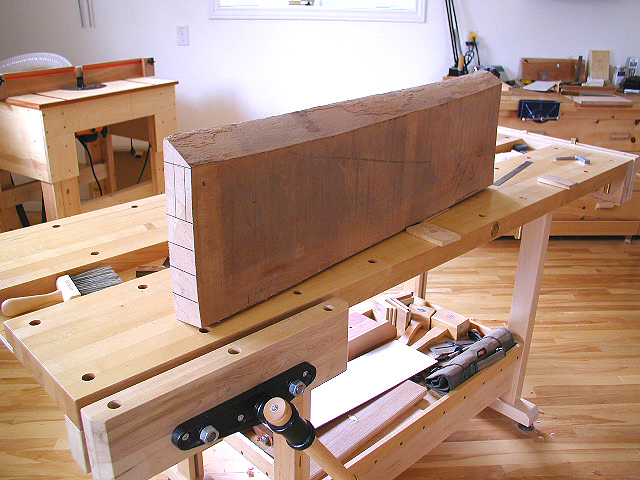
In 2005, I developed this system of bench stops as a simple alternative to installing a tail vise on a workbench. So I’ve been using this system of bench stops for 12 years now, it will be the 12th anniversary shortly. The system is set up on one of my original workbenches. This happened to be my main workbench at the time. Apologies for the vintage photography, but I wanted to keep the article period correct. The alternative tail-vise setup and holdfasts are used when face planing boards.

Most flat, regular benches can easily be modified to incorporate the hand planing setup using these bench stops ( Roubo style). Photos below are of the bench stop setup on the workbench in my workshop. This bench has been modified for adapting the two bench stops. Adapting a bench can be expanded for longer bench stops, more holes for versatility, etc. I chose this particular hole spacing for the type of work I do. I am also left-handed and plane left to right, therefore I set this up on the back side of my bench which is unencumbered by a face vise ( the face vise is on the front of bench ).

It is important to get the 3/4 in. dowel holes square to the bench and in-line with each other, to ensure that the 12 in. planing stops are perpendicular to each other. The side bench stop does a great job of preventing the board from rotating sideways while hand planing with diagonal strokes. It has a large bearing surface to keep any size board from rotating. The side bench stop is also movable within a 12 in. span on 3 sets of holes, allowing for narrow boards and wider boards (2 in. to 14 in.).
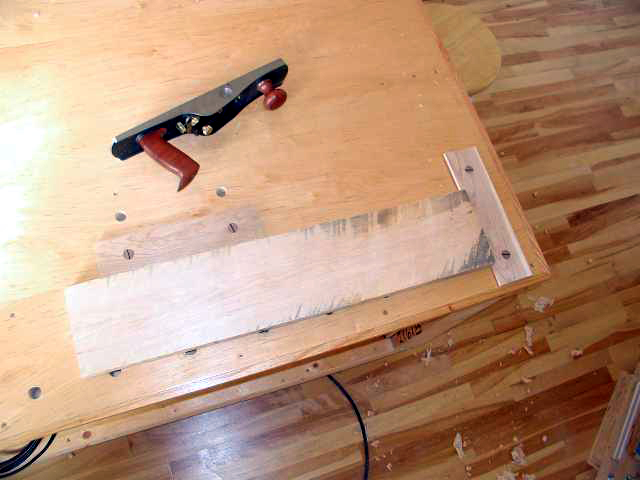
Handplaning-1
The side bench stop can be swung around towards the front bench stop with a parallel set of holes, this is to accommodate shorter boards. Pictures above and below provide a better explanation.

The wide front bench stop also serves to prevent the board from rotating or shifting sideways as it has a large bearing surface for the front edge of the board. Bench stops (front and side) are friction fit so they can be raised (1/4 in. to 3/4 in.)  to accommodate thicker boards, very much like a bench dog. Otherwise, the minimum height of the bench stops would be approximately 1/4 inch. The hole spacing is arbitrary and based on the type of board sizes I typically hand plane in my own furniture making. two inch long birch dowels are glued in the bench stops using ebony wedges in the dowel kerf for tightness. Kerfs at the ends of the dowels are cut on a bandsaw.

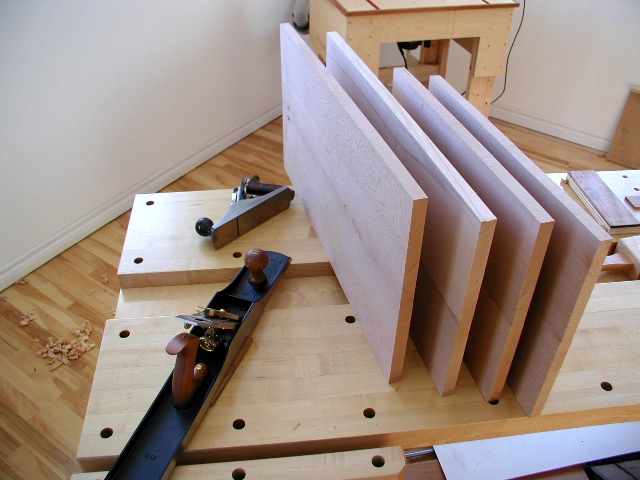
A benefit of having a board simply against bench stops is that you really cannot drag the plane back in your strokes since it would pull the board back. This trains you to lift the handplane instead of dragging it back. The only wear on the blade then is from the forward stroke. Also you eliminate the tendency of bowing a thinner board caused by clamping between bench dogs and tail-vise and distorting the board while planing.  You also gain more tactile feedback and control of your planing and it becomes easy and quick to re-orientate the board end for end or flip it over, etc.

Handplaning-1
Typical bench stop setup to act as a tail vise.
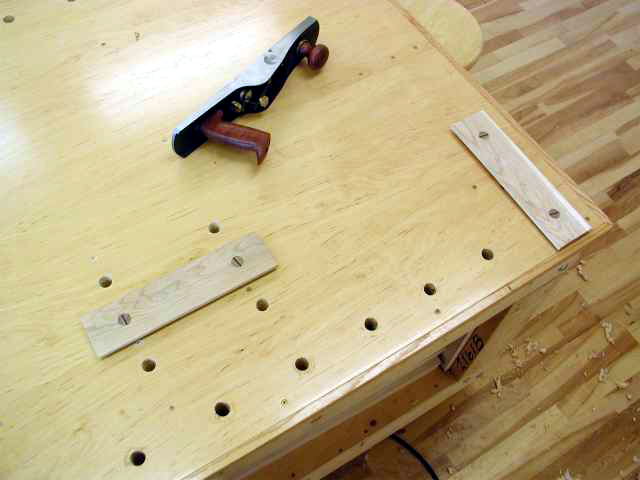
handplaning-2
More holes can be added to allow for very short boards as done in bottom pictures. It is then a matter of swinging the side bench stop around towards the front bench stop. The spacing and location I have selected is optimized for the length and width of boards I typically handplane in my furniture making.
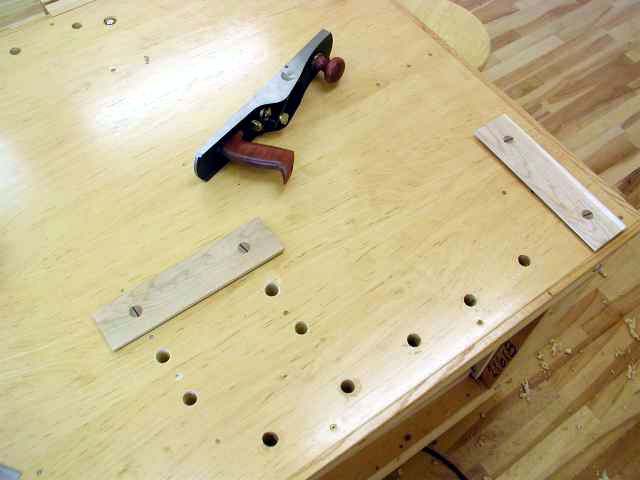
Bench Stops 3
The bored 3/4 in. holes can also be used for bench dogs and also used for holdfasts for irregular sized pieces.
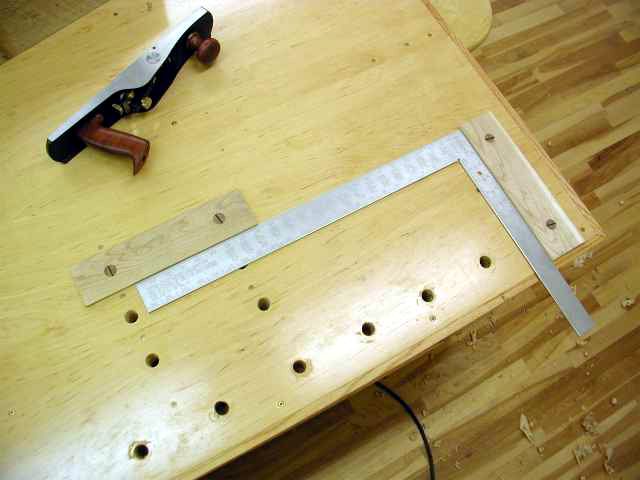

Align side bench stop to be perpendicular with face of front bench stop using a large square to mark holes. This will ensure the complete edge of the bench stop is against the board to be planed.
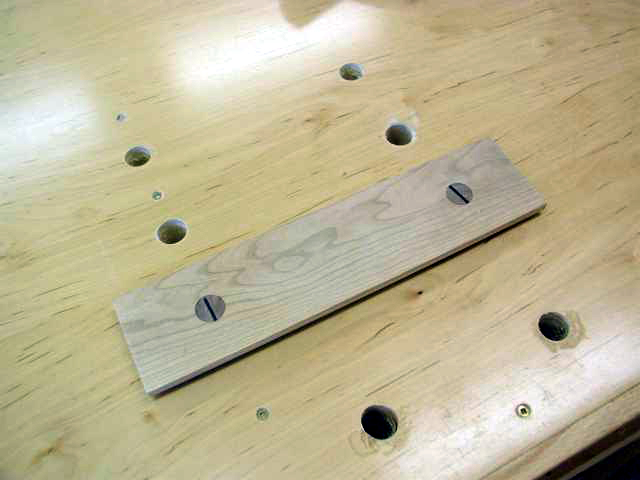
Planing stops 4
Side bench stop set to narrowest width, closest to edge of bench.
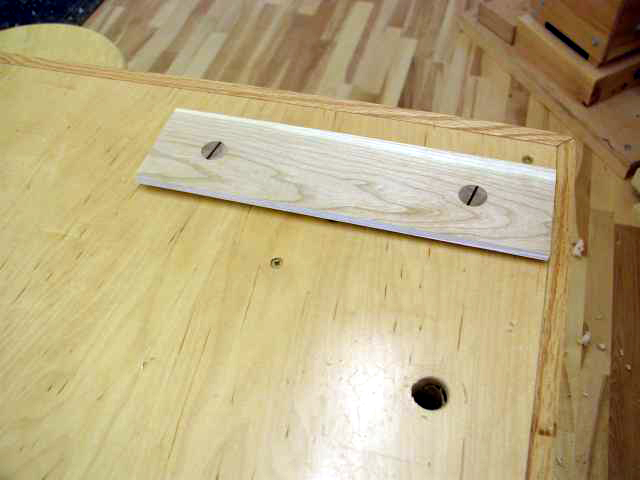
Planing Stop 5
Bench stops can be raised or lowered as conventional bench stops for thinner or thicker boards.
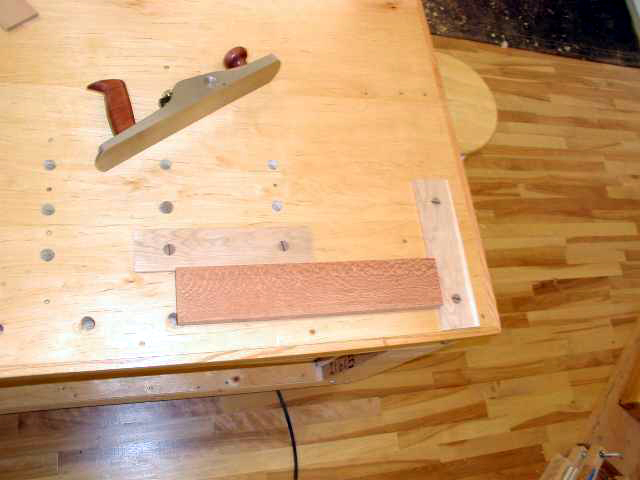
Planing Stop (small board)
A short, narrow piece of lacewood being planed.
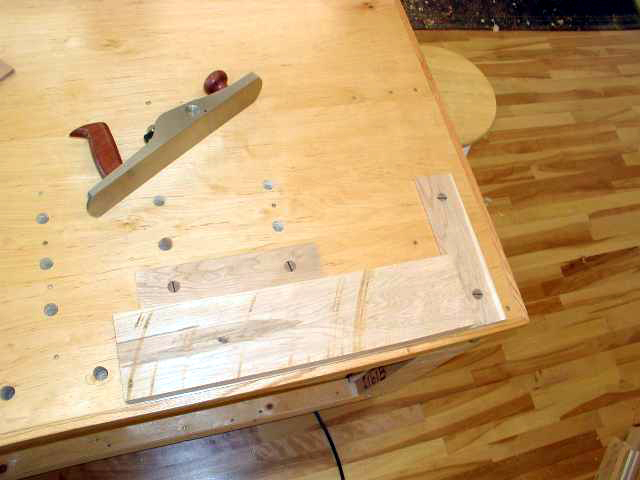
Planing Stop 6
Parallel set of holes bored to accommodate shorter and wider boards shown above. It is recommended to lay out all the holes you will need for this system and then drill them. This ensures that all holes are square and perpendicular to each other and the front bench stop.
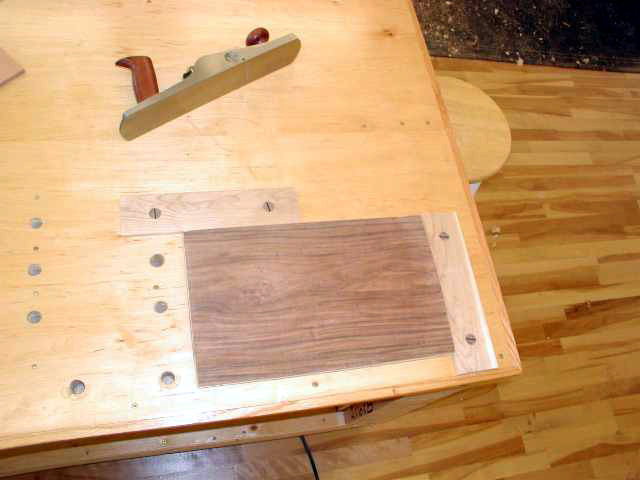
Planing Stop 8
A small, wide panel being face-planed.

Developing this alternative tail vise idea led to an article on bench stops and jigs I wrote for Fine Woodworking Magazine. The article 4 Bench Jigs for Handplanes was published in early 2009.