Follow our Board Jack Plan and build your own portable board jack. The portable board jack is designed to hold work along the front edge of a workbench. The board jack works in conjunction with a face vise to hold long boards or panels for handplaning or other bench operations. The board jack is both versatile, portable and self-aligns to the workbench top. It attaches to the underside of any workbench top with a slab top. It is easily adaptable to a workbench top with a thickness between 1 1/2 inches to 3 1/2 inches.
 The board jack is easily positioned along a workbench surface. The position depends on the length of board to be supported on edge. The board jack design originated from a need to clamp the opposite end of a board along its edge while handplaning. With a long board clamped in the face vise of a standard workbench, there is no support at the other end of the board. Unless your workbench is designed with a horizontal apron or skirt and dog holes, it is difficult to support the end of a long board along its edge. When not in use, the board jack is quickly and easily removed and stored beneath a workbench.
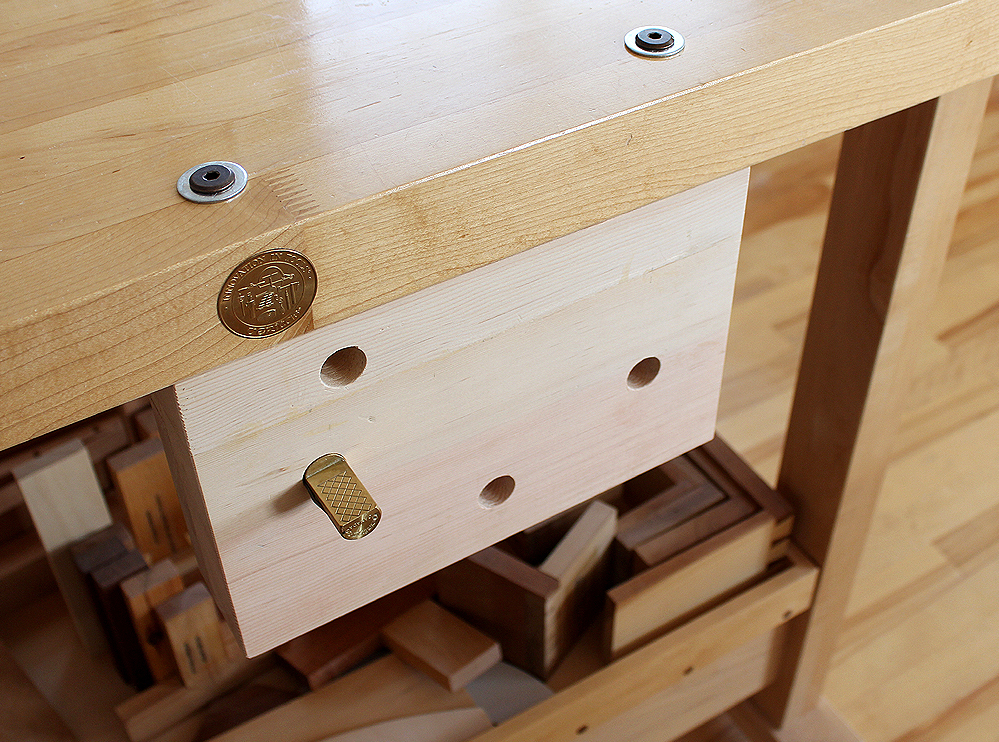
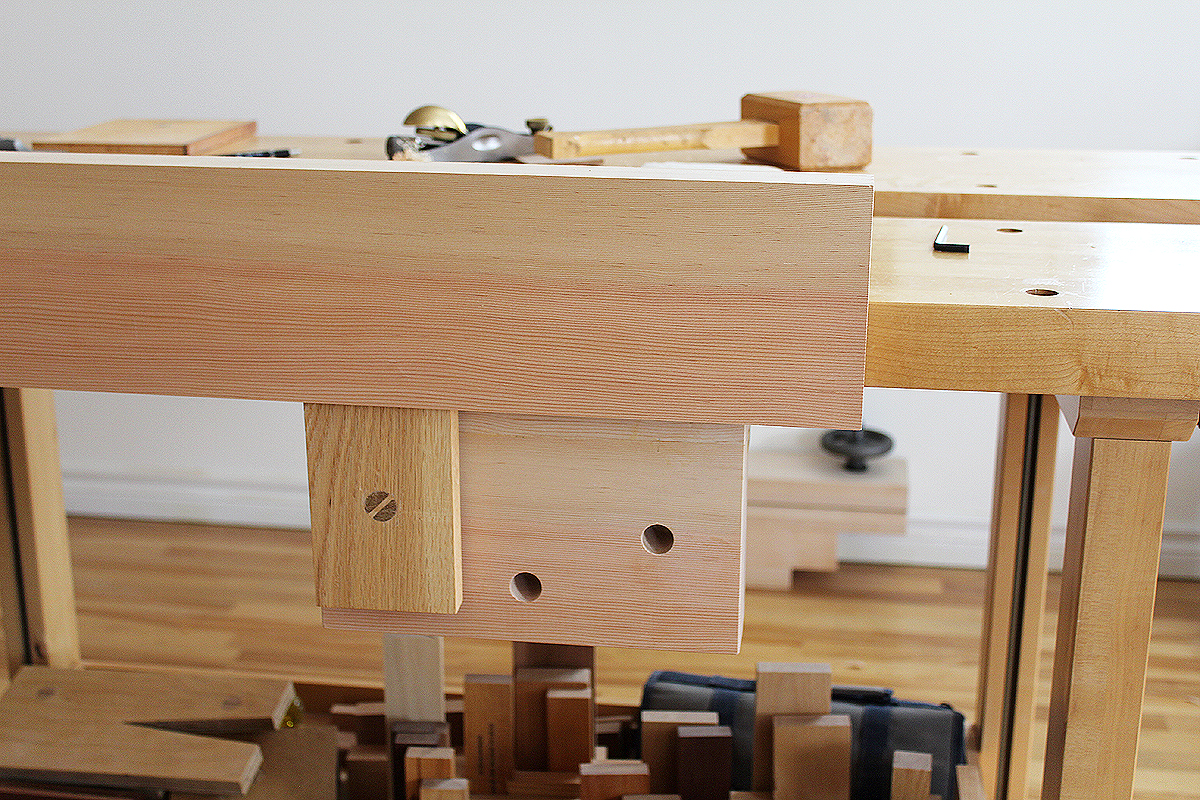 An alternative is to incorporate a sliding board jack beneath the edge of a workbench top. Although this is an option, it is necessary to design the workbench with this complex feature. The portable board jack is instead designed to attach to the underside of a slab type workbench without any modifications to the workbench. All that is necessary are at least two dog holes close to the front edge of the workbench. You will also be able to easily clamp long, wide panels along the front edge of a workbench using the portable board jack. The portable board jack is designed to be versatile. It can be placed anywhere along a workbench top where dog holes are accessible.
The portable board jack is attached to the workbench top using standard bolts. Quick-connect bolts allow the board jack to be quickly removed or installed, as well as attached to another area of the workbench. Several bench holding accessories can be used with the board jack including bench dogs and surface clamps.
 Comprehensive information, board jack techniques, large photos and (16) detailed computer designed diagrams (CAD) included with the board jack plan purchase. Images and illustrations of attaching the portable board jack to a workbench are also included.
Board Jack Plan $14

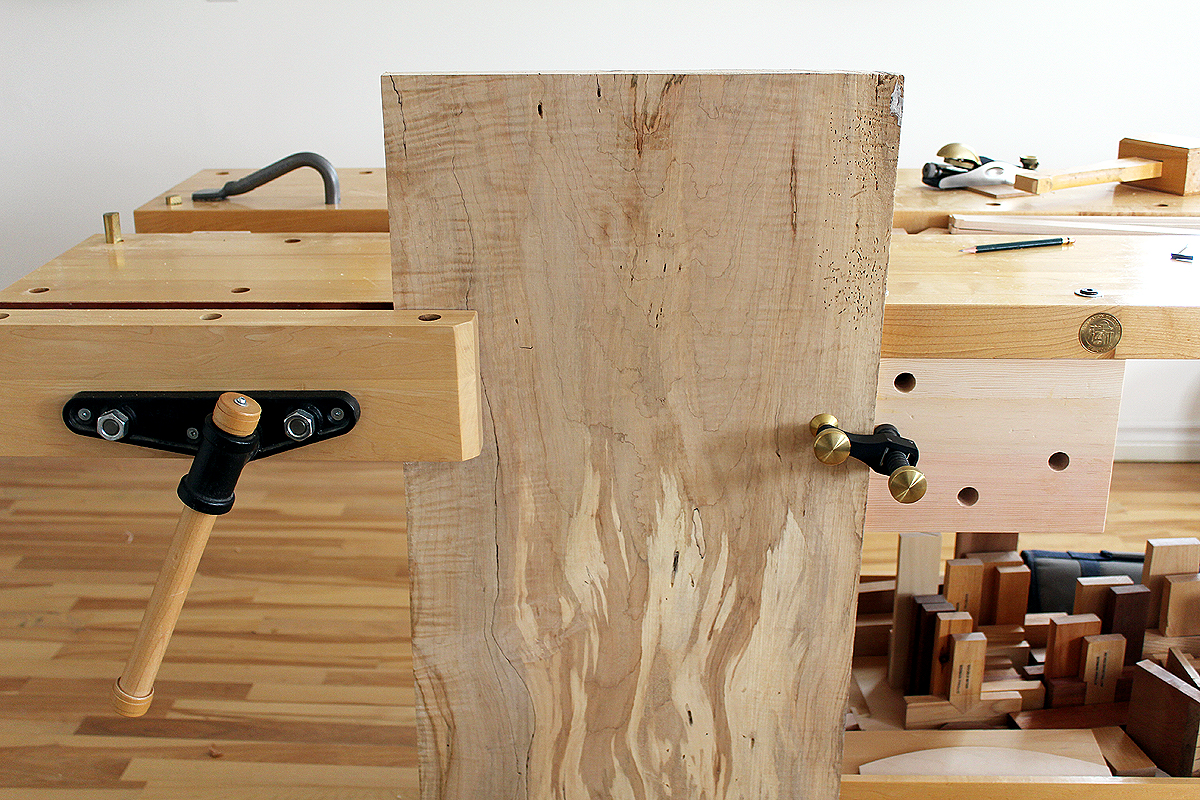
 Follow our Moxon vise plan and build your own portable Moxon twin-screw vise. The portable Moxon vise is designed to hold work above the standard height of a workbench. The Moxon vise design is widely attributed to a Joseph Moxon. Joseph Moxon (1627 – 1691), was the hydrographer to Charles II English printer specialising in mathematical books and maps. Moxon’s 17th century book The Art of Joinery first described the double-screw vise. In this historical publication the Moxon vise was documented – a double-screw held to a workbench top with clamps or holdfasts in order to facilitate certain work.
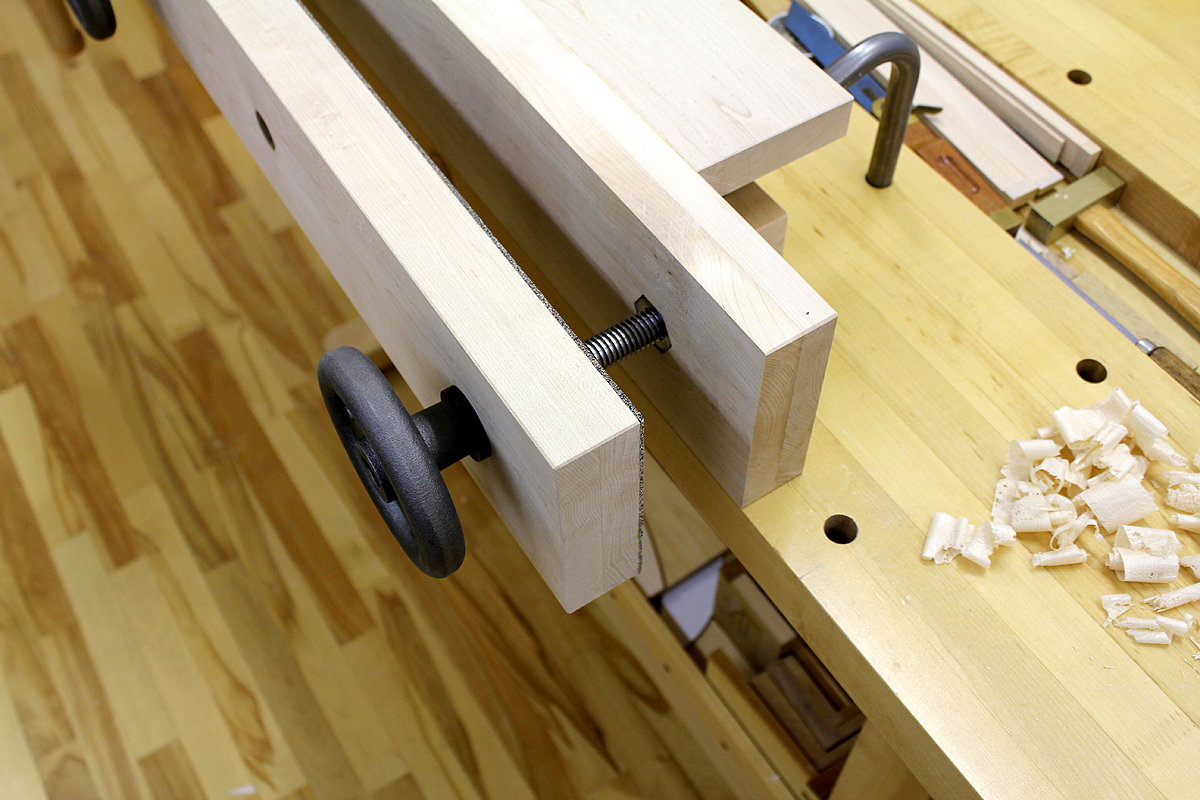 Comprehensive information, Moxon vise techniques and video, large photos and (14) detailed computer designed diagrams (CAD) included with the Moxon vise plan purchase. Images, video and illustrations of attaching the Moxon vise to a workbench are also included.
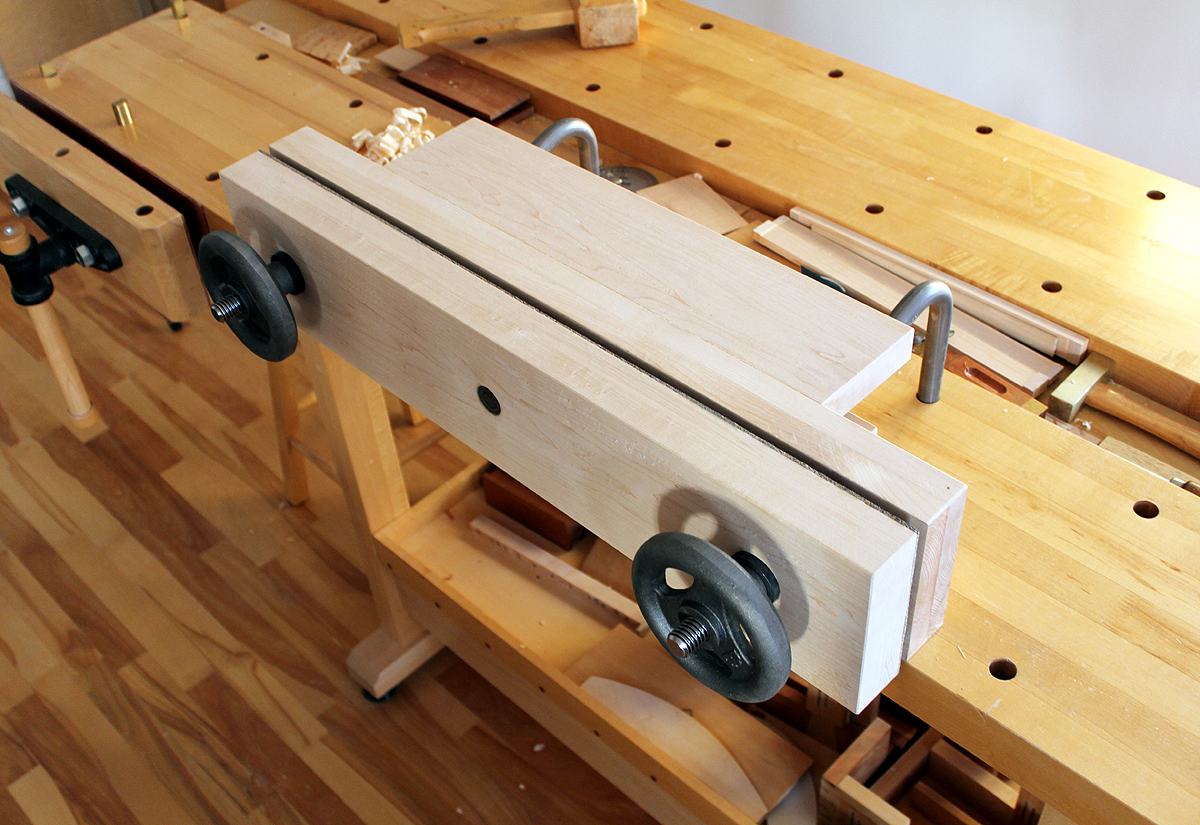
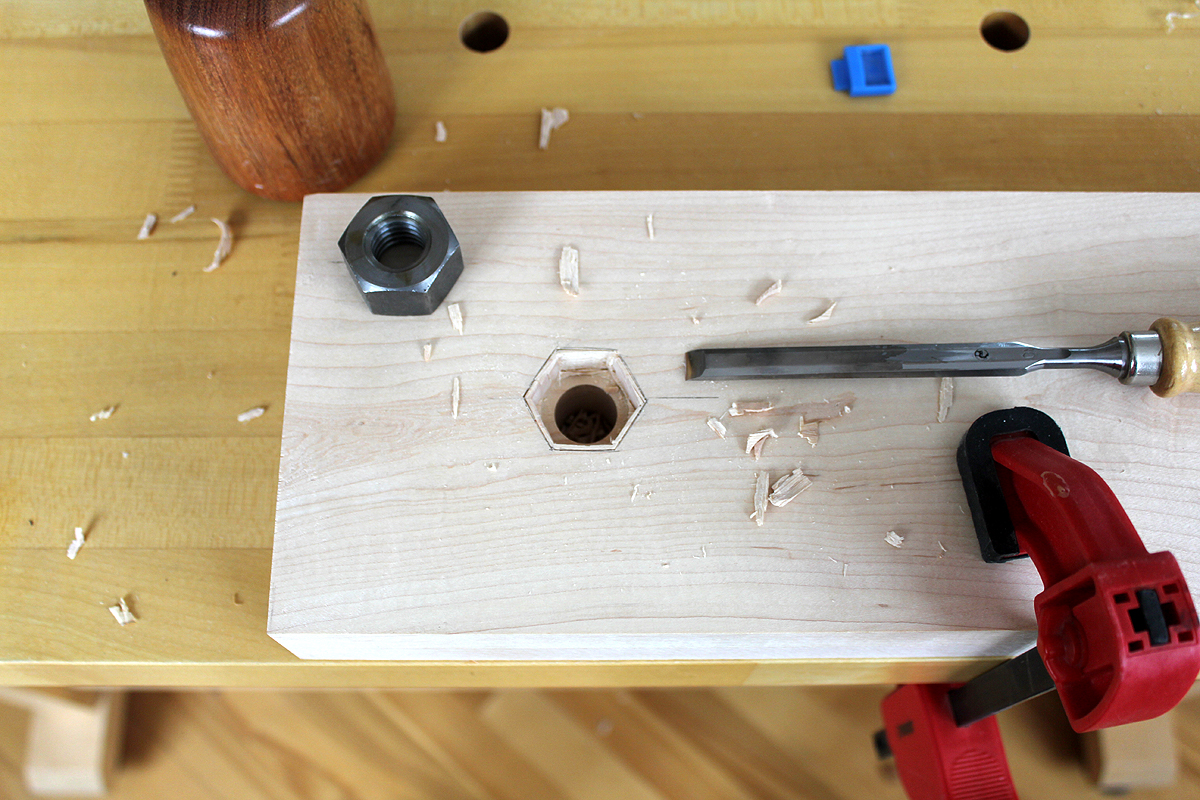 Mortising for the captive nut in the rear jaw inside face was performed using bevel-edge and mortise chisels. Hard maple is well.. hard! In this case, the mortise chisels excelled at hogging out material from the 3/4 inch deep mortise. With a softer hardwood, lighter bevel-edge chisels would have been sufficient. I also oriented the nut so it would align well with the long edges of the rear jaw, mostly an aesthetic consideration.
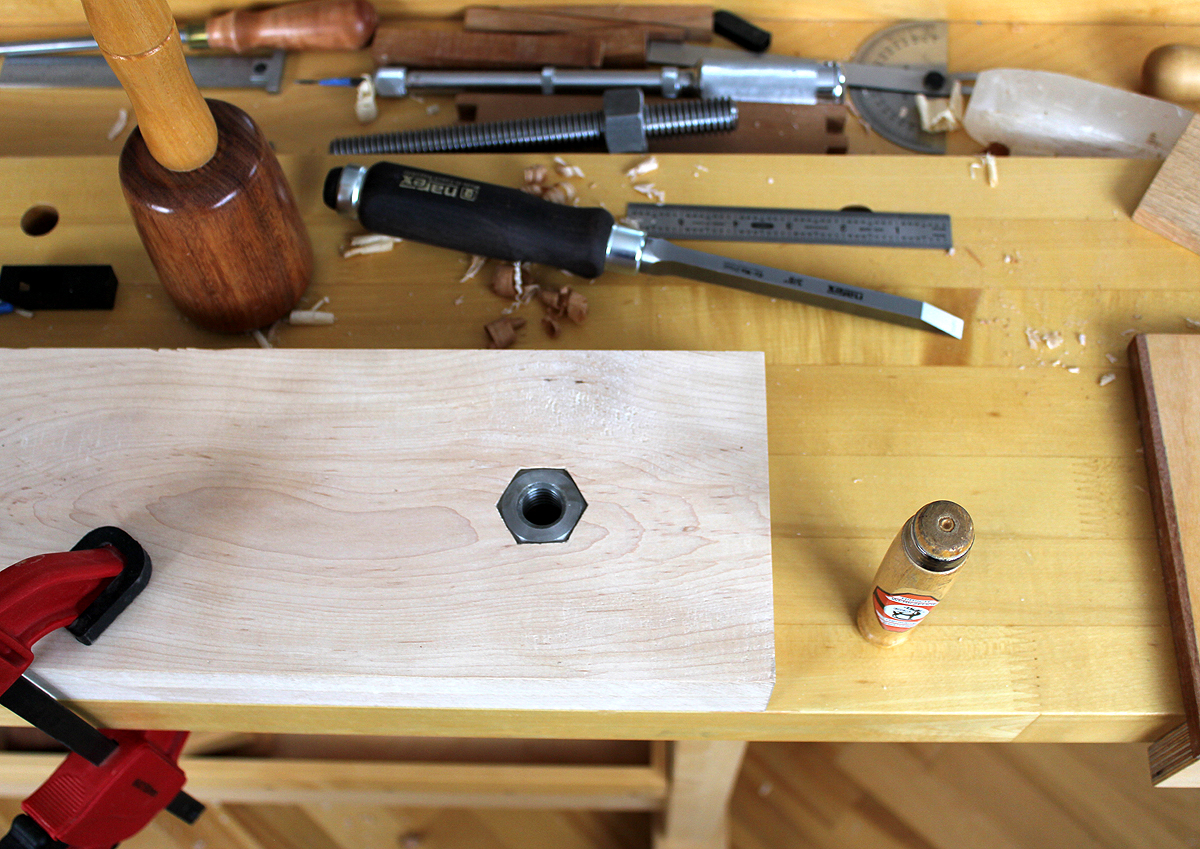 After test-fitting the Benchcrafted hardware and ensuring it worked smoothly, the next step was to attach a large block of wood to the rear. This block of wood would both stabilize the vise assembly and allow holdfasts to be used to clamp the Moxon vise to the workbench top. Several other intermediate steps were performed, always careful to get alignments exactly correct. There is almost no room for error in making these vises since replacing either of the jaws is both time and material consuming. A more in-depth article on how I made this Moxon vise will be available at the web site soon.
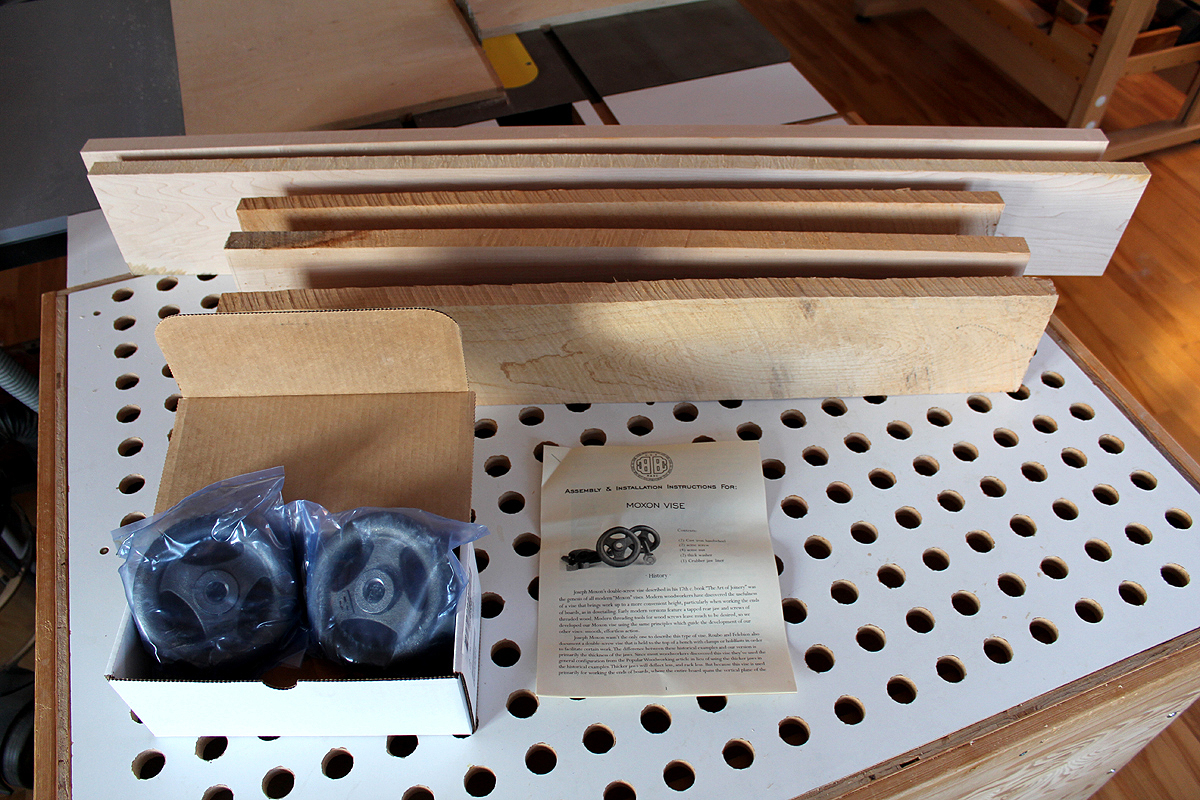 I’m not 100% sure of the origins of the Moxon vise design, but it is widely attributed to Joseph Moxon. Joseph Moxon (August 1627 – February 1691), hydrographer to Charles II English printer specialising in mathematical books and maps. Moxon’s 17th century book The Art of Joinery first described the double-screw vise. In this historical publication was documented the Moxon vise – a double-screw held to a workbench top with clamps or holdfasts in order to facilitate certain work.
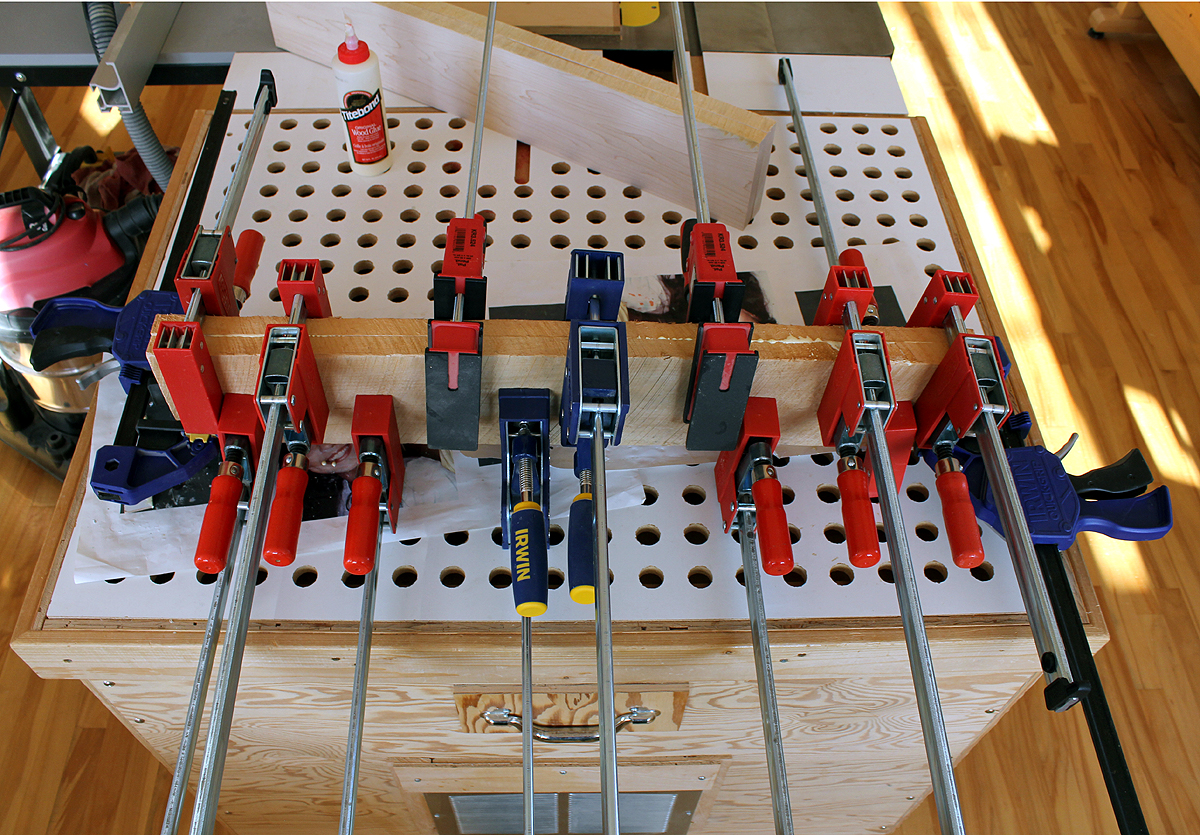 So after deliberating on the design, I simply went at it and worked on the front and rear jaws. Not having 8/4 stock available to me, I opted to laminate some 4/4 maple pieces instead. In the past, I have had success with the strength and stability of 4/4 boards laminated together. In selecting the boards, I mixed the grain orientations up so each of the laminated boards would counter the grain of the other board. This, in my opinion, balances out the internal stresses of the woods and keeps it all straight and stable. Laminating one of the jaws here with 4/4 boards. As they say, one never has enough clamps. In the pic above, this was almost the case, but it worked out. I do have other clamps, but for the most part, they are lighter.