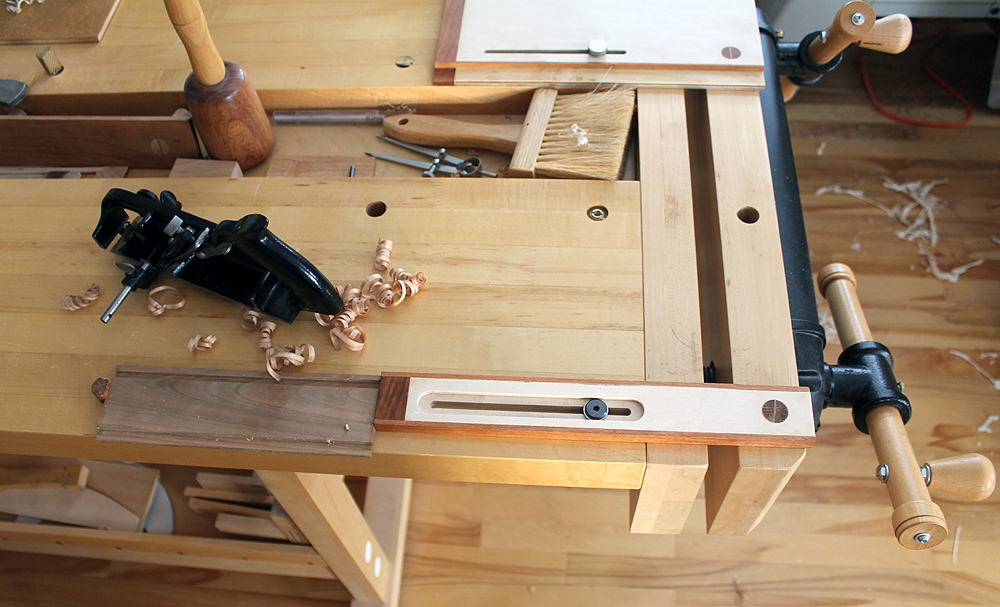
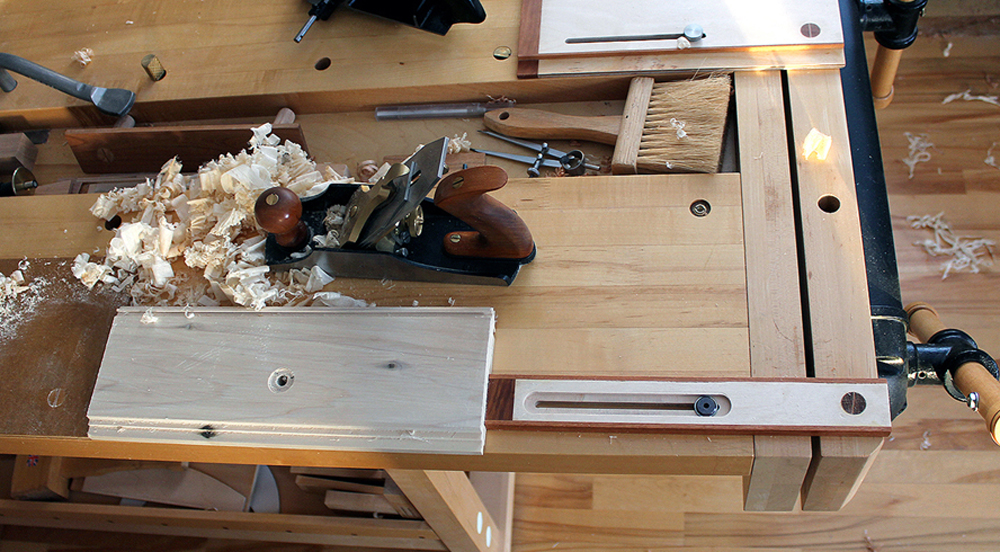
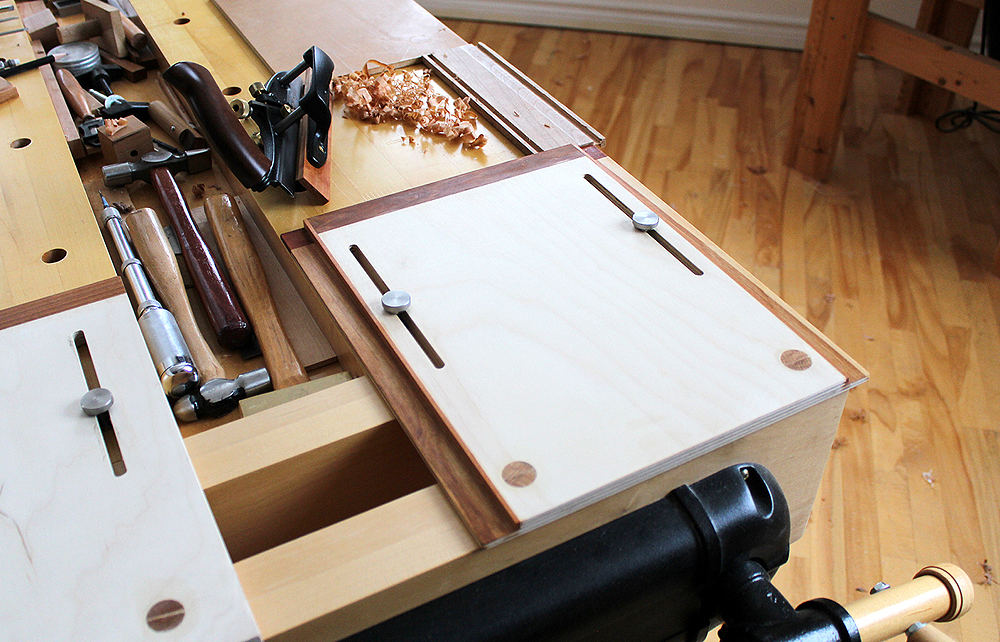
 Narrow version of sliding tail vise seen in the image above and below. Works with a single bench dog hole in end vise. Locks workpiece firmly in place to allow handplaning along the grain or creating profiles along edge of boards. Can be easily removed and installed. Bolt is optionally tightened for larger workpieces.
The sliding tail vise works either with a twin screw vise or end vise. Through use of one or two dog holes in the jaw of the twin screw or end vise, the sliding tail vise engages and clamps a workpiece to the bench. The sliding tail vise is designed to move effortlessly along the surface of the workbench. The workpiece is then secured at the opposite end through a bench dog or batten between bench dogs (for wide workpieces). This is seen in the images. The design of the sliding tail vise originated with frustration in successfully clamping both narrow and wide boards to a workbench top.
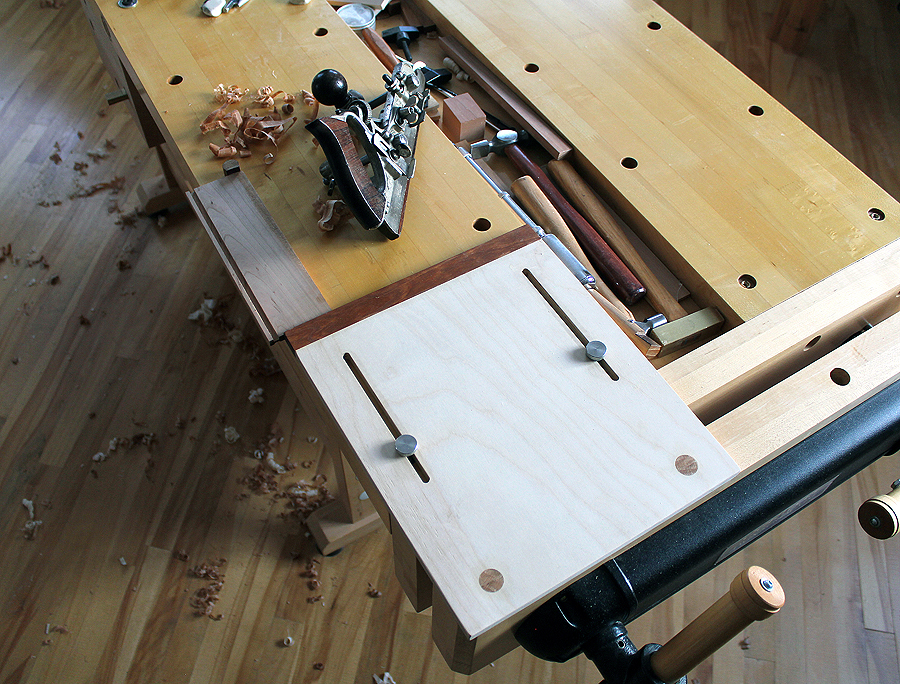
When creating grooves or rabbets along a long edge of a board, it is critical that the board overhang the workbench surface for a plow plane or rabbet plane to operate correctly. It is often a challenge to properly secure the workpiece so it does not shift while handplaning. Racking is also introduced since narrow boards such as drawer sides can only be clamped with minimal surface area at the ends. The sliding tail vise aids tremendously in this type of clamping through a wide clamping surface, attachment at either two or four points, and a locking mechanism. Two thumbscrews or recessed hex-head bolt lock sliding tail vise to workbench surface eliminating racking stresses.
When handplaning large, wide boards there is a tendency for the board to rack and shift away from the twin screw or end vise. This occurs when flattening a board in a diagonal direction or across the grain. The sliding tail vise solves this dilemma through a locking mechanism. Once the sliding tail vise is securely clamped to the large, wide board, two thumbscrews are tightened. This relieves pressure on the twin screw vise and creates a solid, wide clamping area for the workpiece. The sliding tail vise now resists racking since it is attached firmly to the workbench surface at two points and locked at two points in the twin screw vise jaw.
The sliding tail vise is designed to be portable and can be installed on either side of a workbench surface, as seen in the images. This feature addresses the handedness of the woodworker. As a left-handed woodworker, I can relate to the many challenges of handplaning at a workbench. The sliding tail vise, when installed on either side of the workbench, addresses any concerns with direction of handplaning. Handplaning will always be directed away from the vise. Left or right-handed woodworkers can now work equally well at a workbench.
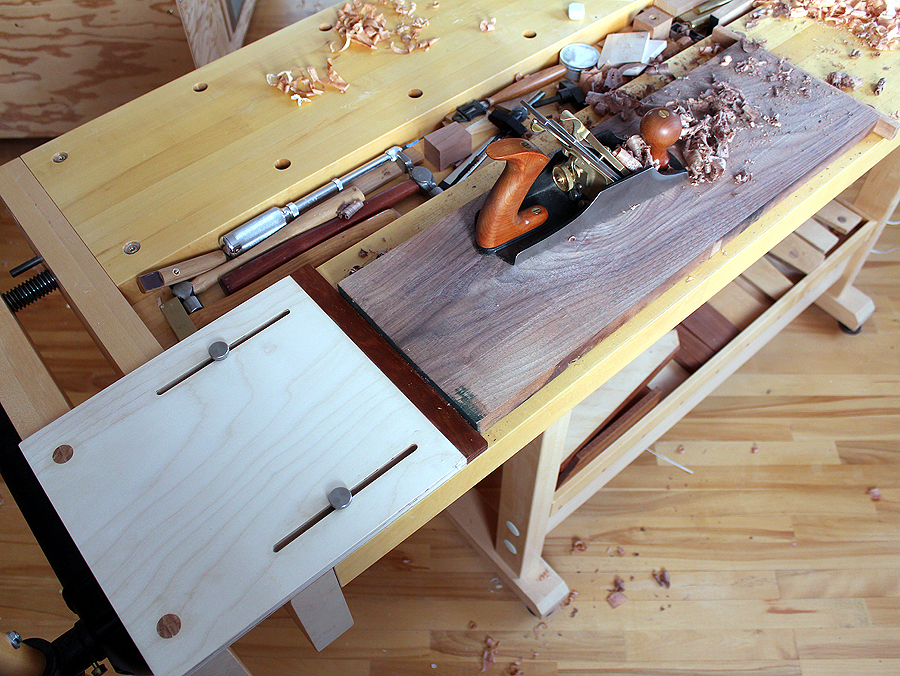
Modifications are included in the plan for a rabbeted ledge along both long edges of the sliding tail vise. This allows plow and rabbet planes to better clear the workpiece. The rabbeted ledge is seen in the image below. Two rabbeted ledges allow the sliding tail vise to be mounted on either side of the workbench top. The narrow, single dog version can be seen in the top (2) images. Build instructions, CAD diagrams and hardware list for both the wide (two dog) and narrow (single dog) sliding tail vise are included in plan.
Sliding Tail Vise Plan $14